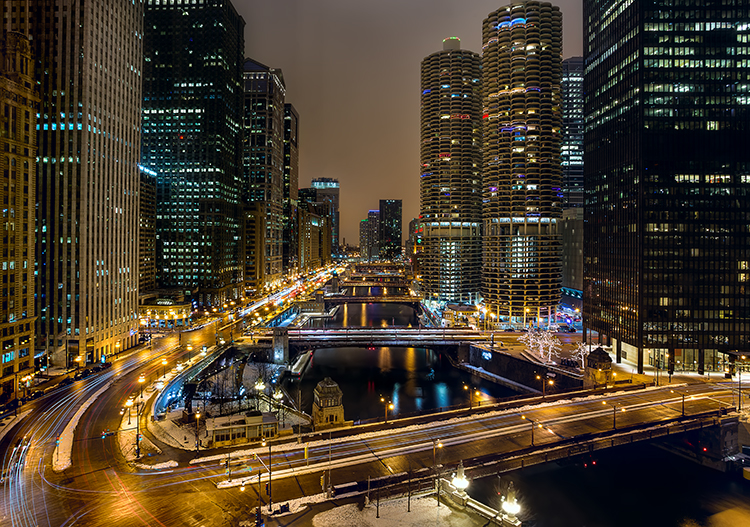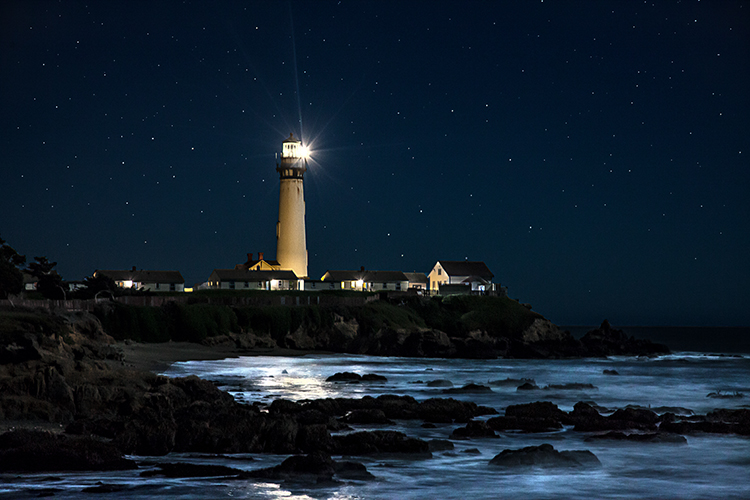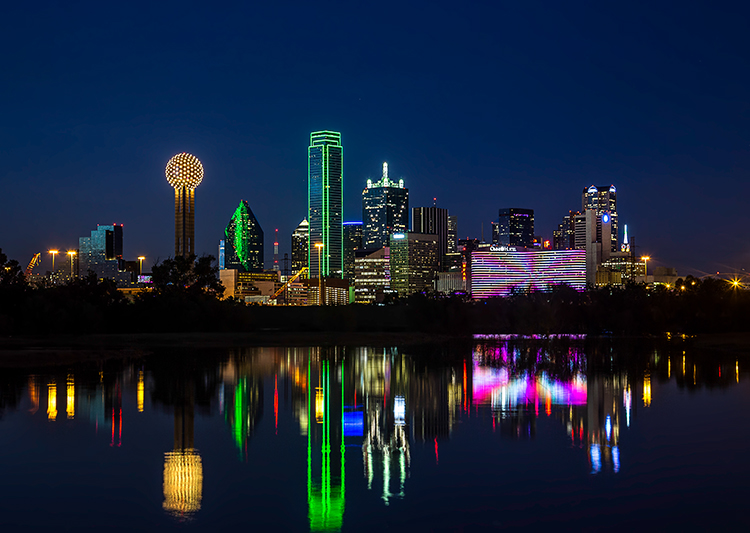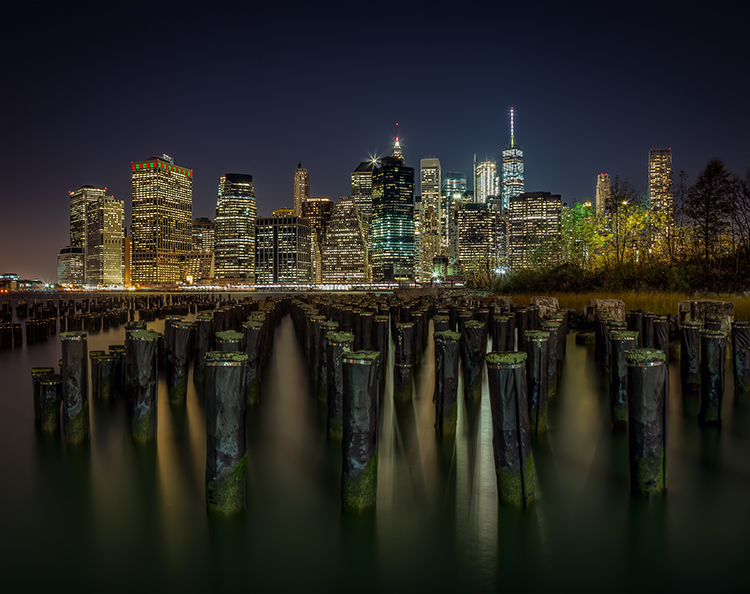
Thursday, February 22, 2018

Understanding Depth of Field for Beginners

A Post By:Bruce Wunderlich
You may have heard the term depth of field (DoF), but if you are new to photography you may not yet be taking advantage of how DoF can enhance your photos. A basic definition of depth of field is: the zone of acceptable sharpness within a photo that will appear in focus. In every picture there is a certain area of your image in front of, and behind the subject that will appear in focus.
Understanding depth of field in photography.
This zone will vary from photo to photo. Some images may have very small zones of focus which is called shallow depth of field. Others may have a very large zone of focus which is called deepdepth of field. Three main factors that will affect how you control thedepth of field of your images are: aperture (f-stop), distance from the subject to the camera, and focal length of the lens on your camera. Here are some explanations and answers to other common questions concerningdepth of field.

How does aperture control depth of field?

Aperture refers to the access given to light from the lens to the camera sensors. Thesize of your aperture (the diameter of the hole through which light enters the camera) controls the amount of light entering your lens. Using the aperture (f-stop) of your lens is the simplest way to control your depth of field as you set up your shot.
Large aperture = Small f-number = Shallow (small) depth of field
Small aperture = Larger f-number = Deeper (larger) depth of field
It may be easier to remember this simple concept: The lower your f-number, the smaller your depth of field. Likewise, the higher your f-number, the larger your depth of field. For example, using a setting of f/2.8 will produce a very shallow depth of field while f/11 will produce a deeper DoF.
The image on the left was captured at 250th of a second at F5.0 which resulted in a very shallow depth of field,
The image on the left was captured at 250th of a second at f/5.0 which resulted in a very shallow depth of field.  Because of this the background is out of focus allowing the subject to stand out. The image on the right was captured at 1/5th of a second at f/32 which created a deep depth of field and a sharper background.

How does distance control depth of field?

The closer your subject is to the camera, the shallower your depth of field becomes. Therefore, moving further away from your subject will deepen your depth of field.

How does the focal length of a lens control depth of field?

Focal Length refers to the capability of a lens to magnify the image of a distant subject. This can get complicated, but the simple answer is that the longer you set your focal length the shallower the depth of field. Example: Your subject is 10 meters (33 feet) away, using a focal length of 50mm at f/4; your depth of field range would be from 7.5 -14.7 meters (24.6-48 feet) for a total DOF of 7.2 meters (23.6 feet). If you zoom into 100mm from the same spot, the depth of field changes to 9.2-10.9m (30.1-35.8′) for a total of 1.7m (5.7′) of depth of field. But if you move to 20m (66′) away from your subject using the 100mm lens, your depth of field is almost the same as it would be at 10 meters using a 50mm lens.
Image of a swan hiding in the tall grass captured from about 5 meters with 300 mm focal length created a DOF only about 5cm.
This image of a swan hiding in the tall foliage was captured from about 5m (16′)  with a 300mm focal length lens. This combination of focal length and distance created a depth of field of approximately 5cm (2″).

What if I just have a point and shoot camera, or don’t know how to change those settings?

Even with a point and shoot camera, there are ways to control your depth of field. In the Scene Modes menu, look for a symbol of a human head, which is the setting for portraits. This will give you a narrow depth of field. In the same menu there is also a mountain symbol, which is a setting for landscapes, which will give you a deeper depth of field.
If you are a beginner with a DSLR there are some simple ways you can control depth of field and still use and automatic shooting mode. By choosing Aperture Priority mode you can set your aperture to get the depth of field that you want, and the camera will automatically set the shutter speed.

Can I set the depth of field exactly for each situation?

Yes, but because changing your aperture affects your shutter speed, the result may not meet the needs of your image. For instance, if you are trying to increase your depth of field by reducing aperture size you will also need to increase (slow down) your shutter speed which could make your image blurry. Understanding how all these settings work together can increase your control over depth of field.

Is depth of field equally distributed in front and back of my focus point?

No, it’s usually about one third in front and two thirds behind your focal point, but as your focal length increases it becomes more equal.

How will understanding depth of field improve my images?

Managing depth of field is one of the most important tools at your disposal, because having tack sharp images is one of the most important factors to getting that great shot. Knowing how to make the parts of your image you want sharp and the parts you want to be out of focus, is a great artistic tool to create great images.
Getting the right DOF for your shot can make the difference
Getting the right depth of field for your shot can make all the difference.

When should I use a shallow depth of field?

Using a shallow depth of field is a good way to make your subject stand out from its background and is great for portrait photography. Shallow DoF can also be useful in wildlife photography, where you want the subject to stand out from its surroundings. This is also useful because many wildlife photo opportunities are low light situations, and increasing your aperture size will give you more light. Shallow depth of field is also effective for sports photography where many times you want to separate the athlete from the background to bring attention to them. The result of this should also help give you a fast enough shutter speed to freeze the action.
This image captured at 300mm focal length and F/ produced a very shallow DOF. Because of this very shallow DOF it is important to set your focal point on the eye. Notice how the bird appears to pop out from the background.
This image captured at 300mm focal length and f/5.6 produced a very shallow depth of field. Because of this, it is important to set your focal point on the subject’s eye. Notice how the bird pops out from the background.

When should I use deeper depth of field?

In landscape photography it is important to get as much of your scene in focus as possible. By using a wide angle lens and a small aperture you will be able maximize your depth of field to get your scene in focus.
In this landscape captured at 50mm at F/16 Focus point was set at 8 meters which made everything from 4 meters to infinity in focus
This landscape was captured with a 50mm focal length at f/16. The focus point was set at 8 meters, which made everything from 4 meters to infinity in focus.

How can you determine depth of field?

There are several on-line sites that will provide depth of field charts for your camera and lenses. Also, there are a number of apps available for smart phone users that can calculate it for you while you’re in the field. Most cameras have a DoF preview button which will give you a preview as you look through the eye piece. (This is probably the easiest and most under-utilized method.) Using this button may cause your image to appear darker as you view it through the eye piece, but not to worry. Your image will be properly exposed as long as you have the correct exposure settings.

Can depth of field be adjusted to get everything in focus?

Yes, using what is called the hyperfocal distance. When you are focused at the hyperfocal distance, your depth of field will extend from half the distance to your focal point to infinity. Use a DOF calculator to find your hyperfocal distance. If you don’t have a DoF calculator, a good rule of thumb is to focus a third of the way into the scene. Using an aperture of about f/11 or higher with a wide angle lens will maximize your depth of field.

What about depth of field in macro photography?

Because most macro images are produced in low light and with a longer focal length, the depth of field is often very shallow. Adjust your lens to the smallest aperture that the light will allow. It may also be necessary to increase your ISO to allow you to properly expose the image and to maximize your depth of field. Still, in many macro images your DoF may be very minute. With this very narrow focus it becomes necessary to use a tripod, because even the slightest movement of the camera will move your macro subject outside your depth of field.
120 mm Marco at F8 still is a very shallow DOF with the lens only 15 cm from the focal point on the front flower.
This 120 mm macro even at f/8 still has a very shallow depth of field.

What is bokeh?

Bokeh (boh-ke) comes from the Japanese word meaning blur. This effect is produced by the out-of-focus areas in your image that are beyond the depth of field. Bokeh commonly refers to the pleasing circle shapes caused by the shape of the lens aperture. Usually created when shooting with your aperture wide open, such as f/2.8, bokeh can also be created with smaller apertures if the background is distant enough.
Bokeh in this image caused by the distance from the subject to the background which fell well beyond the DOF
Bokeh in this image was created by the distance of the subject to the background, which fell well beyond the depth of field.

To summarize controlling depth of field:

Increase depth of field
  • Narrow your aperture (larger f-number)
  • Move farther from the subject
  • Shorten focal length
Decrease depth of field
  • Widen your aperture (smaller f-number)
  • Move closer to the subject
  • Lengthen your focal length
Take control of your depth of field. Understanding how these adjustments control your it will greatly improve your photography.

Sunday, February 18, 2018

Adobe RGB Versus sRGB – Which Color Space Should You Be Using and Why

Adobe RGB Versus sRGB – Which Color Space Should You Be Using and Why

How frequently have you been to your camera settings to switch between Adobe RGB and sRGB color space? Are you even aware of what these terms mean, or what exactly is a color space? Even I was unaware of these technical terms until a few years back but I quickly realized their importance.

What is a color space?

A color space is a part of the color gamut, which is basically the universe of color tones. So you can assume different color spaces to be planets of different sizes. Out of many planets, Adobe RGB and sRGB are two most commonly used color spaces in photography.
Depending on your preferences, you can choose the desired color space and get the best possible result out of it.
Adobe RGB Versus sRGB - Which Color Space Should You Be Using and Why
By The original uploader was Cpesacreta at English Wikipedia [Attribution or CC BY 2.5], via Wikimedia Commons

What are Adobe RGB and sRGB color spaces?

Adobe RGB is a bigger color space than sRGB as it is comprised of many more variations of color tones. This is one of the reasons that Adobe RGB monitors are vastly used by photographers – they can display more colors as compared to an sRGB monitor.

Monitors and printers

Adobe RGB monitors are used by a majority of modern day printer operators as well because they are capable of showing what a CMYK (cyan magenta yellow and key or black) printer color profile can produce. This helps the printer operator to ensure that colors that are being displayed on the Adobe RGB monitor shall be very close to the print that comes out of the CMYK color space printer (used for magazines and publications).
So being a photographer it makes sense that you use an Adobe RGB monitor so that you can edit your photos and see the actual colors that will come out in the prints.
Whereas, if you are sure that you will not get your photos printed in the near future then it does not make any sense to use an Adobe RGB monitor. If you only take photos for yourself or to upload them to the web, then an sRGB monitor is ideal for your purposes.
Adobe RGB Versus sRGB - Which Color Space Should You Be Using and Why

Camera shooting color space

But in order to view the actual colors of Adobe RGB or sRGB color space on your monitor, you need to capture the photo in that particular color space in the first place.
Unless you capture a photo in the required color space, be it Adobe RGB or sRGB, you cannot use that photo to its full potential. Shooting photos in the larger Adobe RGB color space allow you to capture more color tones, thus helping you see accurate colors on Adobe RGB monitors and in the prints. Whereas clicking in sRGB color space allows you to upload images to the web without any change in colors.
While shooting in one of these two color spaces each has their own advantages, there are few disadvantages as well.
Adobe RGB Versus sRGB - Which Color Space Should You Be Using and Why
Setting your camera color space.

Advantages and Disadvantages of shooting in Adobe RGB

Advantages:

  1. You get to capture a wider range of color tones in your photos.
  2. This color space is capable of displaying color tones that come out of a CMYK printer, thus ideal color space if you print your photos.

Disadvantages:

  1. When you upload a photo captured in Adobe RGB color space on the web, the colors get desaturated (and can look “off”).
  2. Adobe RGB monitors are costly, so in order to edit Adobe RGB color space image, you need to invest a lot in a monitor.
NOTE: You can convert an Adobe RGB color profile image into sRGB color space using software such as Photoshop and Lightroom.
Adobe RGB Versus sRGB - Which Color Space Should You Be Using and Why
Left: While exporting photos in Lightroom, you get the option to choose the color space. Right: In Photoshop, you can go to Color Settings and select the required option as your working color space.

Advantages and Disadvantages of shooting in sRGB

Advantages:

  1. When you upload a photo shot in sRGB color space, the colors remain the same and do not get desaturated, unlike an Adobe RGB image.
  2. A majority of monitors in the world use the sRGB color space and are not that expensive, unlike Adobe RGB monitors. This ensures that the colors that you experience on your monitor would be almost the same on any other sRGB monitor.

Disadvantages:

  1. As the color tones in sRGB are less compared to Adobe RGB, you do not get accurate colors in your prints.
  2. If you submit your photos for photography contests, there are chances that those photos will be viewed on an Adobe RGB monitor. This might reduce your chances of winning as a photograph captured and edited in Adobe RGB will look more pleasing to the judges.

Conclusion

Adobe RGB or sRGB, which color space to choose while shooting?

If you are a photographer who prints your photos often and you want to ensure that the colors are accurate in your prints, then you must shoot in Adobe RGB color space. Shooting photos in sRGB color space might give you a variation in colors that you see on your monitor and in the final prints. Also if you participate in online photography contests, it is safe to capture and edit photos in Adobe RGB color space.
But if you only capture photos to upload them on the web, then shooting in the sRGB color space is the ideal choice for you. If you upload Adobe RGB color space photos to the web, you will notice that colors get desaturated.
Adobe RGB Versus sRGB - Which Color Space Should You Be Using and Why
Left: This is how your photo gets desaturated when you upload Adobe RGB color space photo to the web. Right: When you upload sRGB color space photos, you get correct colors as seen here.
Nonetheless, to be on the safe side you can shoot photos in the Adobe RGB color space. If needed you can always use the file for prints, and if you wish to upload to the web then you can simply convert the color space using Adobe Photoshop or Lightroom.


Thursday, February 8, 2018

Imagenomic_Professional_Plugin

Noiseware is a high-performance noise suppression software tool designed to decrease or eliminate noise from digital photo or scanned images.

Unlike most image processing software techniques that utilize simple methods (such as median filters) to treat digital noise in images, Noiseware features a sophisticated yet fast noise filtering algorithm.

Using the adaptive noise profile capability and sharpening function, Noiseware greatly reduces the visible noise while preserving the details in the images.- Portraiture is a Photoshop plugin that eliminates the tedious manual labor of selective masking and pixel-by-pixel treatments to help you achieve excellence in portrait retouching. It intelligently smoothens and removes imperfections while preserving skin texture and other important portrait details such as hair, eyebrows, eyelashes etc.

Portraiture features a powerful masking tool that enables selective smoothening only in the skin tone areas of the image. What makes PortraitureΓÇÖs masking tool truly unique is its built-in Auto-Mask feature. It helps you quickly discover most of the skin tone range of the image automatically and, if preferred, you can manually fine-tune it to ensure optimal results, providing unmatched precision and productivity.

For finer control, you can specify the smoothening degree for different detail sizes and adjust the sharpness, softness, warmth, brightness and contrast.

Portraiture comes with pre-defined presets for one-click effects and, as with all Imagenomic plugins, you can capture your own signature workflow in a custom preset tailored to your specific requirements and photographic portfolio.- Real Effects with Realgrain

If you long for the darkroom age, the soft, warm graininess of the film, or you seek to infuse that fuzzy, retro look or perhaps enhance your digital photos by simulating the greater range and texture of traditional film, then Realgrain is the plugin for you.
https://www.4shared.com/zip/SLMZBWfWba/Imagenomic_Professional_Plugin.html

Friday, February 10, 2017

5 Reasons Why You Should be Doing Night Photography

5 Reasons Why You Should be Doing Night Photography

A Post By: Jim hamel

We photographers tend to avoid night photography. Sure, there are some who seem to specialize in it, but most of us stick to daylight hours.
night photography tips and course
Historically, there were good reasons for this. Night photography was hard. You couldn’t see what you were doing because there were no LCD screens on camera. Every mistake cost you money in the form of film and processing. Even when digital cameras came on the scene, the low light performance in most cameras was so atrocious that it made it difficult to shoot at night.
But now, times have changed. Obviously, with digital, you can see exactly what you are doing and take as many test shots as you like. Cameras – and the low light performance of cameras in particular – have improved drastically in the last three to five years. Post-processing tools have come a long way as well, so now you can enhance your night photos a great deal.
night photography tips and course
All that makes night photography much more feasible. But is it something you should do? Will it lead to great photos? Is it fun?
The answers are; yes, yes, and yes. In this article, I will show you some of my favorite things about night photography. Once you get started, you are sure to have some of your own reasons.

1.  Otherwise mundane places are dramatic at night

Most photographers struggle with one thing in particular. That is how to make their photos stand out from the crowd.
Photographing at night can help you make that happen. Let’s be clear, though, just taking any old photo at night won’t get you there. But you’ll be surprised at how many locations that appear rather mundane or drab during the day can be made to look incredibly dramatic at night.
night photography tips and course
In cities, for example, you will find well-lit facades, bridges, skylines, etc. The city lights add interest and give you lots to work with. During the day, these appear flat and uninteresting. At night, however, there is usually dramatic lighting added. In rural environments, you have the night sky. A clear sky in the daytime is nothing special, but at night you are treated to a sky full of stars. In either case, you can add your own light to the scene via a flash unit or light painting (bring your flashlight!).
In addition, the night is just different than what most people normally see. That’s not to suggest that night photography is somehow a novelty, but photography during the day is much more common. People are accustomed to seeing photos during the day. They are even used to seeing dramatic sunrise and sunset photos. Night photos are a little more unusual. Take advantage of it.

2.  You can achieve amazing effects that are impossible during the day

Light trails, starburst effect, motion blur . . . these are all easy at night. The long shutter speeds that are often required for proper exposure in night photography can lead to really cool effects. In addition, at night you can work with lights that just aren’t on during the day.
night photography tips and course
At night, not only are you taking pictures that many others don’t take because they are at home, but you are also taking pictures that many photographers can’t take. You need to have more than a rudimentary understanding of exposure to get a good night shot. Long exposures are very common, so a tripod and a remote shutter release are necessities. Beyond that here are some other considerations for night photography:
  • You need to control shutter speed to get motion blur where you want it and avoid camera shake when you don’t.
  • Aperture control is needed to balance competing goals of letting enough light in, achieving a proper depth of field, achieving a starburst effect to lights, and avoiding diffraction.
  • You need to control ISO to achieve a proper exposure without an intolerable amount of noise that often goes along with night photography.
Granted, some of these things are issues during the day as well. But they are much more of an issue at night. The lack of light is not that difficult to overcome, but you do need to know what you are doing.

3.  The light never changes

night photography tips and course
As someone who loves landscape photography, it can be really frustrating to spend all your time waiting for fleeting moments of light that may or may not ever arrive. Have you ever considered what percentage of a typical day is actually good light for landscape photography? It is a tiny window! Furthermore, how many times have you awaited a sunset and aftermath that didn’t even pan out?
With night photography, on the other hand, you aren’t waiting around for the light. Once the sun is fully set, the light never changes. It is just always dark. Streetlights, spotlights, and other artificial lights aren’t changing (so long as they are on), but rather are constant. So you have all night.
night photography tips and course
You can go out any night and things will be the same. Once you are out, you don’t have to hurry your exposures on account of the changing light. Of course, you may have to hurry if your subject is moving, but it won’t be on account of the changing light.

4.  It is Not So Weather Dependent

Night photography is also not as dependent on the weather. For example, at night, whether it is clear or cloudy, any sky in your picture will likely be black or very dark. You aren’t looking for particular cloud formations.
night photography tips and course
That said, certain weather is not conducive to photography whether it is day or night. Grey, misty days often don’t lead to great pictures (unless you are looking for a mysterious element). And you probably don’t want to go outside in a monsoon or storm. But for the most part the background of your shots just isn’t as weather dependent as shots taken during the day.

5.  It fits your life

You know how you want to get out and do more photography but life keeps getting in the way? You cannot get out during the week because you have to work. On weekends you seem to be tied up with family commitments and errands. It seems like there is never a good time to get out and do some photography.
Most people find, however, that it is easier to get out and do photography at night than during the day. During the day, you are working. At night, most people are off work. During the day, there are family activities. At night the family is winding down and/or going to sleep. During the day, there are errands to run. At night, most stores are closed. You get the idea. There is just less going on at night, such that it always seems easier to get away and do some photography.
night photography tips and course

Conclusion

Don’t forget – half of every day consists of night. In fact, in higher latitudes, the winter can feel like nothing but darkness. But by neglecting the night, you are overlooking the majority of every day. In some ways, you are missing the best part.

Wednesday, February 8, 2017

How to Photograph Close-Up Details of Newborns and Infants

How to Photograph Close-Up Details of Newborns and Infants

A Post By: Kate Nesi

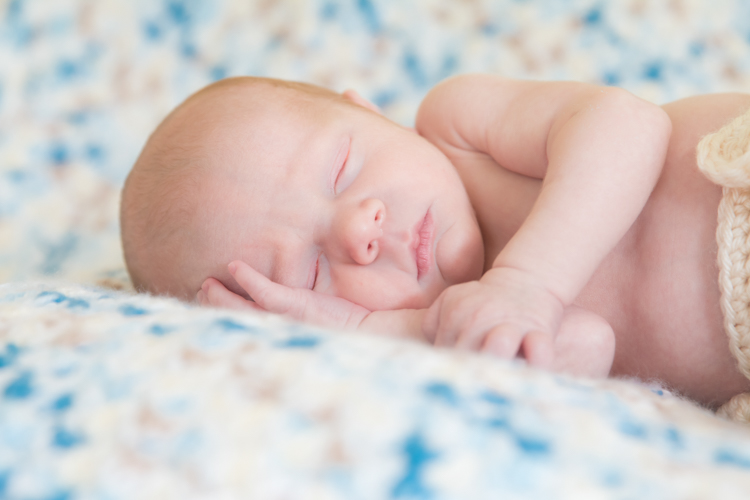
Newborn portraits warm hearts and bring tons of joy to those who view them, especially if they are the new parents or extended family of the newborn. Often, we focus on capturing the new baby among their surroundings with various props and scenes setup. One area we might overlook in our quest to photograph their fresh new life is the tiniest of parts in comparison to the larger world around them. Parents love these special details of newborns just as much, and you’ll enjoy taking them, too.
newborns

The Gear

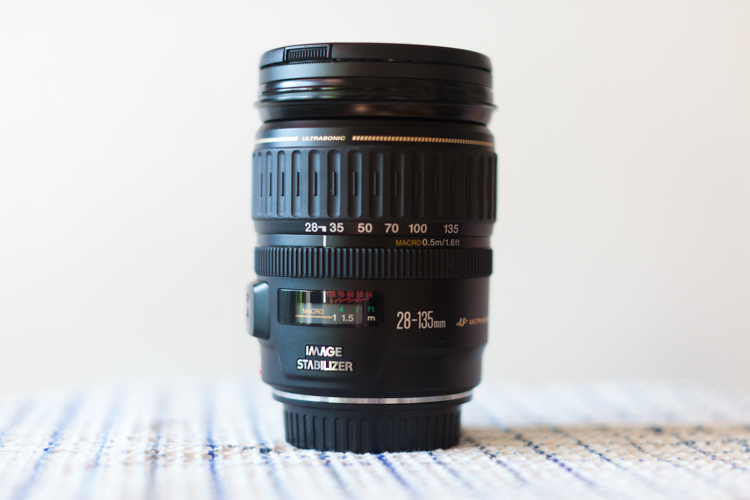
Using a macro lens or a close-up filter will help you get in tight without the need for cropping in post-processing which may degrade the image quality later. Ideally, you want to use a macro lens as they stay sharp while allowing you to get in closer than ever before.
Close-up details of newborns macro lens
If you don’t have a macro lens or close-up filter in your lineup, a zoom lens works well, too. You can be a short distance away and still get close-up without needing to crop. Post-processing may help with sharpness if you’re using a zoom lens.
Non-macro fixed lenses may be a little more challenging to use for getting close up, depending on their minimum focusing distance (how close you can be to the subject while still keeping it in focus). Investing in a fixed macro lens or close-up filters would be more suitable for this application.

The Hands

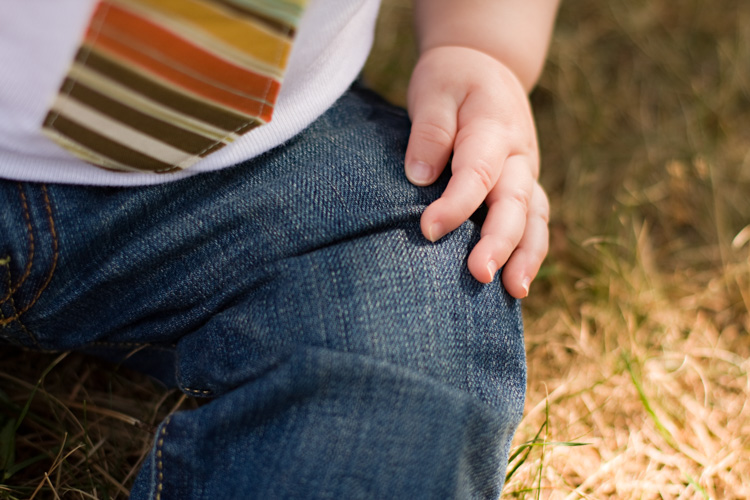
Everyone remarks on the small hands of a baby and how soft they are when they’re holding them. There are two ways to photograph close-up details of newborn hands to make an impact.
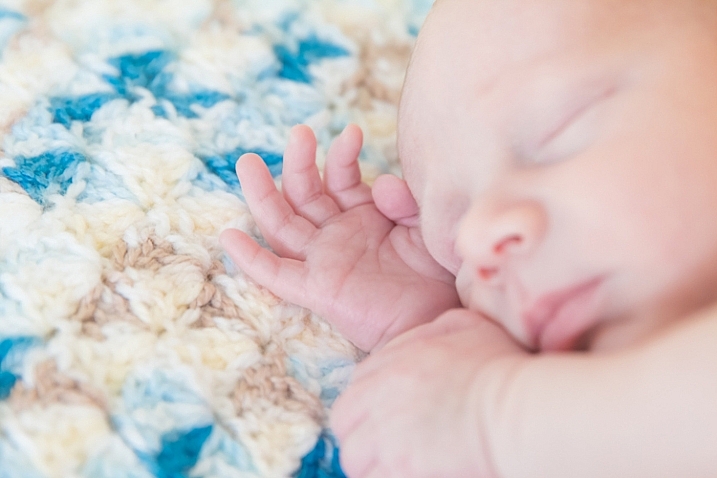
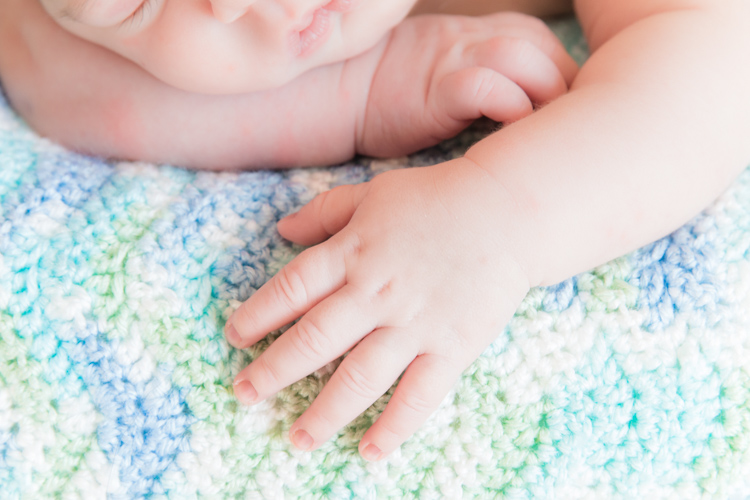
The first way to photograph new hands is up close. Hands resting near their body or close to their face shows the small details on their hands and provides a glimpse into how soft they are.
Close-up details of newborns hands
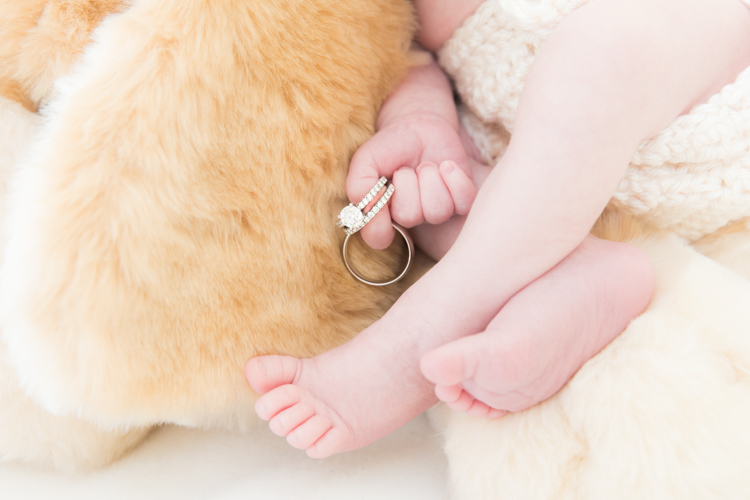
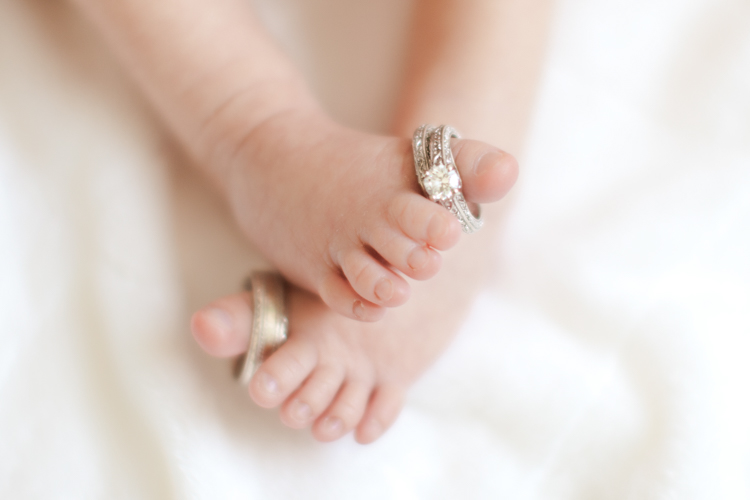
The second way to photograph their hands is against another person’s hand, finger, or an object that shows the actual size of their hand. By capturing hands near or holding an object, the viewer easily can gauge how small the baby’s hands are in comparison to the world around them.
Place their hand around a parent’s finger, or a special family heirloom like wedding rings to show their true size.
Close-up details of newborns hands
As the newborn grows, hands become an integral part to how they begin to use their body or hold themselves steady. Make sure to give some focus to their hands in the coming months as they grow and start to grasp objects, use them for balance, or while they are relaxing in a seated position.
Close-up details of newborns hands

The Face

A newborn’s face is priceless to their parents. Photographing details of their face at various angles will give you more than just a straight-on standard image. Their tiny nostrils or eyelashes can have a tremendous impact on the viewer. Ears, lips, and hair are just as valuable to capture in an image when focusing close-up and on details.
Close-up details of newborns face
As the child grows, his or her face will change tremendously from those first few weeks. Photographing their face over the course of infancy will be a proud addition to their baby album as they morph features from one parent to another over a short time.
Close-up details of newborns face

The Feet

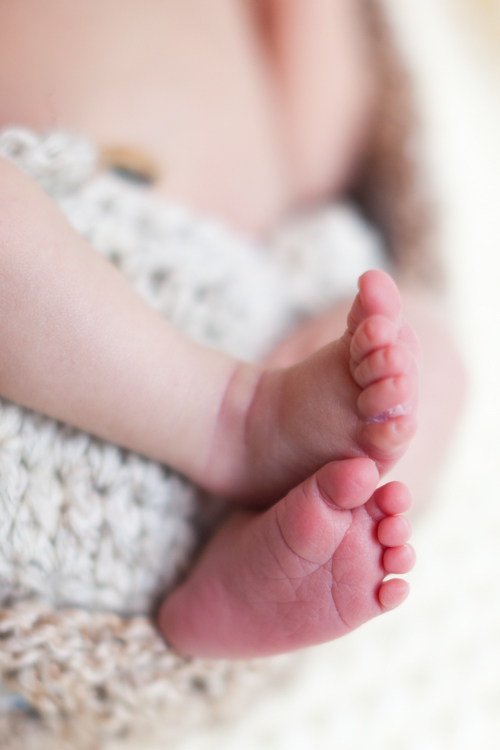
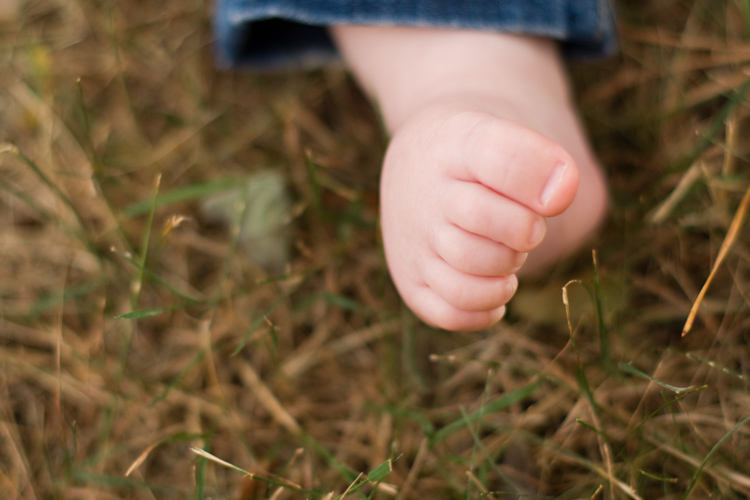
The feet are extra soft and cuddly, minus the wrinkles of age or use. They might be pricked and prodded before they get home, but photographing them alone is worth the additional editing time it may take to remove small pricks from hospital needles. Getting in close to shoot details of newborn feet makes the viewer almost want to touch them and feel how smooth and gentle they are.
Close-up details of newborns feet
Try capturing their feet while they are lying on their back and while also snuggled up on their stomach. Both angles will give you options to again add-in family heirlooms in addition to showing just how tiny they are in comparison to their parents’ fingers. Parents love these types of images that embody the love they have for their new addition.
Close-up details of newborns feet
Also, as growing infants become more aware of their feet, you’ll be able to capture them against a backdrop of their face while sucking on their toes, or pulling back from touching the green grass outdoors for the first time.
Close-up details of newborns feet

Wrap-up

Getting close-up with newborns is essential to telling the entire story of their fresh new life.
Photographing these little parts makes for beautiful wall decor, while also capturing the same features one might ordinarily try to get set in ink for their baby book. To cherish their growth over time, getting in close with macro or zoom lenses offers the best option when focusing on these tiniest of parts and parents will absolutely love these details shots.
Please share your newborn details photos

Friday, June 10, 2016

Natural Light Versus Artificial Light: Which is Better?

A Post By: John Mclntire
Light is the backbone of photography. Without light, there are no photos. After all, the word photo means light. However, which type of lighting is best: natural or artificial? There are a lot of proponents for either camp, but this article will try and dissect the argument from both perspectives, and give you a chance to add your opinion at the end.

Natural Light

natural-light-versus-artificial-light-2689
The arguments in favor of natural light are many, which means it’s not difficult to see why it is attractive to many photographers.

The pros of natural light

Cost

Natural light costs nothing to make use of; there are plenty of gadgets and accessories available, such as reflectors and diffusers, that do help to maximize results, but even without them, it is easy enough to get beautiful results using natural light, without spending any money. This apparent lack of a financial entry barrier makes it much easier for most photographers to immediately assume a preference for natural lighting.

Learning Curve

natural-light-versus-artificial-light-0729
Learning how to see, manipulate and utilize light, whether natural or artificial, is the most critical skill set for a photographer to learn. Fortunately, these break down into many individual skills that can be learned one at a time. In terms of natural light, a lot of these skills are easy to learn and put into practice. For example, you can read a tutorial on using an area open shade to diffuse and soften the light, then put it into immediate practice ten minutes later.
Another thing to keep in mind here is that cameras are designed for use in natural light first. So, a new photographer working their way through the technical basics of their camera, such as metering, aperture and shutter speed, is almost certainly learning with natural light, thereby improving both their camera and lighting skills simultaneously.

Semantics

This point may seem a bit strange, but I have seen it crop up in various conversations, and it does affect some people’s perceptions. We live in a world that is currently obsessed with the word natural. It seems difficult to go more than five minutes without seeing words like organic, all-natural and free from. Of course, most of this applies to food and health products, but the mindset and lifestyle that go with it have become so expansive, that it has seeped into all manner of other aspects in our lives. Whether or not you buy into that sort of thing, try to ask yourself what sounds better and more appealing: natural or artificial? This may not seem rational in terms of photography (an inorganic, mechanical medium), but the appeal is more of an emotional one, and more often than not, emotion trumps rationale.
The biggest concern here is one of marketing. A photographer who refers to themselves as a natural light photographer may very well simply be attempting to appeal to the quite large demographic that holds value over that kind of thing.

The cons of natural light

natural-light-versus-artificial-light-0962While natural light has its advantages, it is not without its own set of shortcomings.

Unpredictability

While the sun is a near constant during daylight hours, the availability of light is only one factor that needs to be taken into account. Clouds and other weather conditions are just a couple examples of things that will alter specific qualities of the light you are trying to work with. Softness, intensity, and color can all change in a split second at the whim of mother nature. If you are attempting to work towards a specific goal, these changes can be a nightmare.

Night

After sunset, what do you do if you’re in a situation where you still want (or need) to take photographs. If you’re relying solely on natural light, the answer is: not a whole lot. Many photographers have no problem with this limitation; however, try to imagine what you can achieve with just another hour or two a day working towards your photography.
Environment

natural-light-versus-artificial-light-2691
Aside from its effect on light, shooting outdoors means you are at the constant mercy of the weather. Cold temperatures, rain, snow, and wind can all make for some uncomfortable experiences for both you and your subjects or clients.
If you’re photographing in areas open to the public, you may be subject to the whims of passers-by. This can lead to an unwelcome audience, or even worse, hecklers. Believe me when I relate, that nothing kills the general mood of a session for both the subject and the photographer faster than excessive and undue attention from strangers.
These environmental problems can often be solved by finding an indoor location andusing window light. While the effects of weather and other people are gone, this solution is not without its own limitations. Window light, while often beautiful for photography, can be quite dim and may require slower shutter speeds than you might like for portrait photography. A lack of space is also a common problem when shooting indoors.
Artificial light

natural-light-versus-artificial-light-3213
Like natural light, artificial light, whether strobes, flashguns or continuous lighting, has its own set of advantages and shortcomings.

The pros of artificial light

Convenience

By owning an artificial lighting solution, you have the means to take photographs at any time day or night, indoors or out, and the weather has no effect on you. If for some reason you want to do food photography at midnight, by all means, go for it.
If you own a set of flashguns (speedlights), they are not only convenient, but portable as well, and can be taken just about anywhere and set up with ease.

Versatility

With studio strobes and the like, the sheer number of ways that they can be used for a vast array of creative results is their strongest selling point. These range fromsimple one light setups that mimic natural light, to complicated setups with seven or more lights.

Control

Another great strength of studio lighting is the control it offers you over your final photograph. By controlling every bit of light in your scene, artificial lighting negates the unpredictability that you get with natural light. If you want a particular look or mood, all that you have to do is set up the lights, and take photos until you have your results. There’s no worry that a cloud will move in and block your light.

Reliability

natural-light-versus-artificial-light-4689
Apart from removing the environmental issues associated with natural light, studio strobes and flashguns are quite reliable. Most models in the moderate price range, and above, are very well made. This means that the power output, as well as color output, is consistent every time it fires. This a huge advantage over the fast changing conditions of natural light.

The cons of artificial light

Cost

natural-light-versus-artificial-light-4563Probably the most off-putting aspect of studio lighting is cost. It doesn’t matter whether you choose studio strobes, flashguns (speedlights), or continuous lighting; decent quality lighting equipment does not come cheap and a good set, along with modifiers, can easily cost over $1000. With natural light being a free and capable resource, it’s easy to understand why so many photographers steer clear of artificial lighting.

Learning Curve

Another initial disadvantage of studio lighting is the amount of knowledge you have to gain, in order to start using it. It’s very possible to accidentally take a beautifully lit photo in natural light. With artificial light, that’s next to impossible.
A lot of photographers, me included, would probably gladly tell you how atrocious their first attempts with studio lighting were. To get good results, you have to spend an enormous amount of time reading and practicing. This involves things like new aspects of aperture and shutter speed in relation to flash, qualities of light, effects of modifiers and the dreaded inverse square law.

So, which is better?

In my opinion? Neither and both are better.
It depends on the job at hand. Both are just tools to be used at each photographer’s discretion. After all, nobody walks into a newly built house and waxes lyrical about the type of hammers that were used. Good photography is good photography, no matter how it was made. If something screams out to be lit with natural light, then natural light is better. Likewise with artificial light.
Each method is capable of stunning results and I would rather have a full toolkit to use for every opportunity, than miss out on something because I restricted myself from using the right tool for the job

10 Tips for Breathtaking Cityscape Photography (+ Examples)

  10 Tips for Breathtaking Cityscape Photography (+ Examples) A Post By:  Richard Schne Capturing stunning cityscape photos might seem hard,...