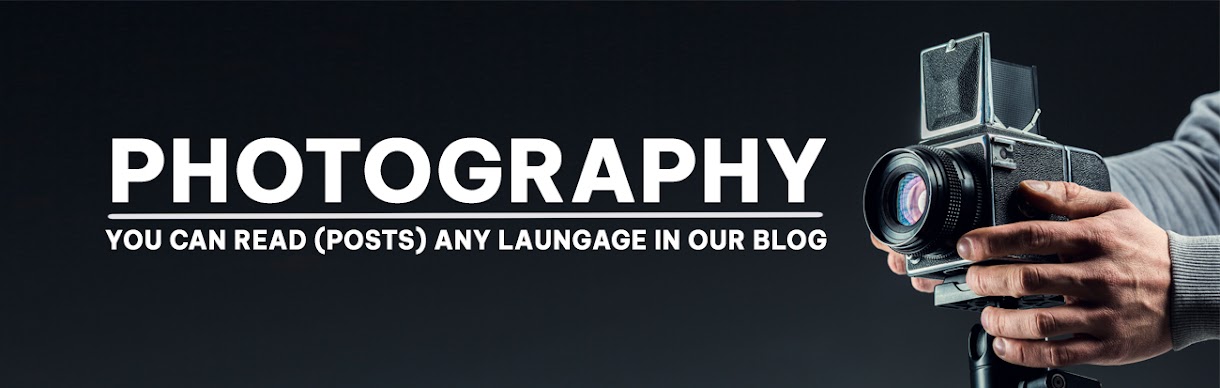
Nikon D90
| Basic Specifications | |
|---|---|
| Full model name: | Nikon D90 |
| Resolution: | 12.30 Megapixels |
| Sensor size: | APS-C (23.6mm x 15.8mm) |
| Kit Lens: | 5.80x zoom 18-105mm (27-158mm eq.) |
| Viewfinder: | Optical / LCD |
| Native ISO: | 200 - 3200 |
| Extended ISO: | 100 - 6400 |
| Shutter: | 30 - 1/4000 |
| Max Aperture: | 3.5 |
| Dimensions: | 5.2 x 4.1 x 3.0 in. (132 x 103 x 77 mm) |
| Weight: | 40.0 oz (1,133 g) includes batteries, kit lens |
| MSRP: | $1,300 |
| Availability: | 09/2008 |
| Manufacturer: | Nikon |
| 12.30 Megapixels | Nikon F | APS-C size sensor |
|---|---|---|
 | ||
Nikon D90 Operation
Top Panel Status LCD
 As with most higher-end Nikon DSLRs, the top-panel data readout LCD communicates a lot of information about current camera settings, and provides an interface for setting many camera functions, when used in conjunction with the various buttons and Command Dials. You can also use the main LCD to adjust many of the same settings, but using the top LCD saves power and can be more convenient when the camera is below eye level.
The illustrations below show the meaning of the various icons and readouts in this display.

1
|
Shutter speed
|
15
|
Flash compensation indicator
|
Exposure compensation value
|
16
|
"Clock not set" indicator
| |
Flash compensation value
|
17
|
Flexible program indicator
| |
White balance fine-tuning
|
18
|
Metering mode
| |
White balance color temperature
|
19
|
Focus points
| |
White balance preset number
|
AF-area mode
| ||
Number of shots in bracketing sequence
|
20
|
Autofocus mode
| |
2
|
Battery indicator
|
21
|
Black-and-white indicator
|
3
|
Flash mode
|
22
|
Number of exposures remaining
|
4
|
Image size
|
Number of shots remaining before buffer fills
| |
5
|
Image quality
|
Preset white balance recording indicator
| |
6
|
White balance fine-tuning indicator
|
Capture mode indicator
| |
7
|
White balance
|
ISO sensitivity value
| |
8
|
ISO sensitivity compensation indicator
|
23
|
ISO sensitivity indicator
|
9
|
"K" (appears when memory remains for over 1000 exposures)
|
Auto ISO sensitivity indicator
| |
10
|
"Beep" indicator
|
24
|
Bracketing progress indicator
|
11
|
GPS connection indicator
|
25
|
Bracketing indicator
|
12
|
Release mode
|
26
|
White Balance Bracketing indicator
|
13
|
Aperture (f-number)
|
27
|
Exposure compensation indicator
|
Bracketing increment
|
28
|
Multiple exposure indicator
| |
14
|
Color temperature
|
Shooting Info Display
One of the most obvious differences between the Nikon D90 and the D80 that went before it is the new model's rear-panel shooting info display. This is somewhat reminiscent of the "Classic" version of the shooting display on the D60, but the information is arranged quite differently, and Nikon has expanded their use of the margin for quick access to some of the more frequently menu items.
| Nikon D90 Rear-Panel Shooting Info Display | |
 |  |
| The rear-panel info display on the Nikon D90 bears some resemblance to those we've seen on recent models, but there's been considerable reorganization as well. | When shooting under dim lighting, you can opt for a light-on-dark version of the screen that doesn't glare so brightly at night. |
 |  |
| The icon bar along the bottom provides quick access to items otherwise buried in the menu system. | The Nikon D90 gives you a lot of choices for what function to assign to the front-panel Func button. |
The illustrations below show the meaning of the various icons and readouts in this display mode.

1
|
Shooting mode
|
19
|
Flash mode
|
2
|
Flexible program indicator
|
Flash control mode for optional flash units
| |
3
|
Shutter speed
|
20
|
Electronic analog exposure display
|
Exposure compensation value
|
Exposure compensation
| ||
Flash compensation value
|
Bracketing progress indicator
| ||
Color temperature
|
21
|
AC adapter indicator
| |
Number of shots in bracketing sequence
|
22
|
Flash value (FV) lock indicator
| |
4
|
Aperture (f-number)
|
23
|
Flash compensation indicator
|
Bracketing increment
|
24
|
Exposure compensation indicator
| |
5
|
Release mode
|
25
|
Multiple exposure indicator
|
6
|
Continuous shooting speed
|
26
|
Bracketing indicator
|
7
|
Remote control indicator
|
27
|
Active D-Lighting bracketing amount
|
Self-timer mode indicator
|
28
|
Image comment indicator
| |
8
|
ISO sensitivity indicator
|
29
|
Autofocus mode
|
Auto ISO sensitivity indicator
|
30
|
ISO sensitivity
| |
9
|
"Beep" indicator
|
31
|
Number of exposures remaining
|
10
|
"K" (memory remains for over 1000 exposures)
|
32
|
GPS connection indicator
|
11
|
White balance
|
33
|
Auto-area AF/mode indicator
|
White balance fine-tuning indicator
|
3D-tracking indicator
| ||
12
|
AE-L/AF-L button assignment
|
Focus point
| |
13
|
Function button assignment
|
34
|
Image size
|
14
|
Picture Control indicator
|
35
|
Image quality
|
15
|
Active D-Lighting indicator
|
36
|
"Clock not set" indicator
|
16
|
High ISO NR indicator
|
37
|
Camera Battery indicator
|
17
|
Long exposure NR indicator
|
MB-D80 battery type display
| |
18
|
Metering mode
|
MB-D80 battery indicator
|
Live-View Display
The Nikon D90 is the first consumer-level DSLR from that company to offer a Live View function. Going everyone else one better, Nikon's also added a Movie recording option to the D90's Live View mode.
| Nikon D90 Live View Display | |
 |  |
| The Live-View display on the Nikon D90 provides a fair bit of exposure information, including shutter speed, aperture, exposure compensation, ISO, card space remaining, image size/compression, white balance setting, program mode, etc. | As noted elsewhere, Contrast-Detect autofocus is the only focus mode available in Live View. The advantage though, is you can position the focus area wherever you want in the image. Here, we've moved it up to center on the Nikon logo on the camera. The focus rectangle turns green when focus is locked. |
 |  |
| One of the advantages of Contrast-Detect autofocus is the ability to do cool things like Face Detection. | And the ultimate Live View feature: Movie recording. Just press the OK button (center of the 4-way controller) any time while in Live View mode, and you're recording a movie! |
Playback Screens
| Nikon D90 Playback Screens | |
 |  |
| Handy when dealing with gigabyte memory cards, a calendar display makes it easy to quickly browse images shot over a period of time. | A 72-image thumbnail display screen is newly added to the Nikon D90, making it easier to scroll through large numbers of images to find the ones you want. |
 |  |
| The nine thumbnail display is familiar from earlier models. | Ditto the 4-thumbnail screen. (Note the "sprocket holes" designating movie files: A first for a DSLR!) |
 |  |
| A variety of playback displays can be cycled through using the up/down arrows on the multi-selector, including image with shooting information, luminance histogram and file information. | Even movie clips get this shooting information screen. |
 |  |
| Histogram displays are pretty standard these days. Here, we see histograms for brightness (luminance) and the red, green, and blue channels separately. | Here's something you may not have seen on a Nikon DSLR before: The histogram updates as you zoom in on the image! - We've long wondered why camera makers hadn't done this; now Nikon has. Cool! |
 |  |
| The highlight clipping warning display blinks blown highlights to call them to your attention. | Of course the D90 also lets you magnify images for closer inspection on its gorgeous 3-inch, 922K pixel LCD. You can magnify them up to approximately 27x for large, 20x for medium and 13x for small images, using the zoom in button. Once magnified, you can scroll around the image using the multi-selector to examine critical detail and framing. |
Playback Menu
The Nikon D90's playback menu options are fairly conventional for the most part, but there are several features not found on the D80, and a greatly-expanded PictMotion (slide show with transitions and sound) menu, moved here from the Retouch Menu.
| Nikon D90 Playback Menu | |
 |  |
| Much of what's here was also on the D80. The Nikon D90 adds display mode, image review, and Pictmotion. | |
 |  |
| Display Mode is a new option, that sets what information screens will be available as you scroll through them via the up/down arrows on the 4-way controller. This can make it quicker getting between different display screens you use, by avoiding having to scroll through ones you don't care about. | |
 |  |
| This isn't new, but it's been moved from the Custom Settings Menu. With the new, much deeper CS Menu, it could have gotten buried pretty deeply. Personally, we'd look first for this on the Shooting Menu, since that's when you actually care about whether Image Review (immediate post-capture image display) is on or off. | |
 |  |
| Pictmotion is Nikon's name for slide shows synchronized with music and with "Ken Burns" effect animation. On the D90, it's shown as a separate menu item, to distinguish it from common fixed-interval slide shows. | You can select individual photos, all the images shot on a given date, or all images on the memory card. |
 |  |
| Five different choices are available for background music. None of it will win a music award, but they're for the most part pretty unobjectionable as slide-show background music. | You can choose a number of transitions between images. The background music contains cues to the camera, so the slides seem to change in time with the music. |
Retouch Menu
This is a feature that's been around on Nikon's consumer cameras since the D40, and one that has been the subject of ongoing enhancement. The items on this menu all represent image modifications that can be done after capture, while in Playback mode, and without the use of a computer. In all cases, applying any of the modifications to an image results in the creation of a new image; your original is always left untouched. Practicing professionals using the D3 or D300 will be more likely to rely on workstation-based software than in-camera one-at-a-time image tweaks like these, but it's conceivable that things like red-eye correction and D-Lighting might be useful to apply on a one-off basis. So this probably isn't a big feature for most users of these cameras, but given the negligible incremental expense of adding this menu to the camera, there's no reason notThe Retouch Menu on the Nikon D90 offers a number of brand-new features. The table below shows a few of the more noteworthy features, both old and new.
| Nikon D90 Playback Mode Retouch Menu Options | |
 |  |
| The Retouch Menu now spans two menu screens, with many more features than even the just-released pro-level D700 has. | |
 |  |
| The Filter Effects retouch option carries the four new options we saw on the D60: Red/Green/Blue intensifiers and Cross Screen (for creating star effects around strong point highlights.) | Cross Screen options include number of points on the highlight stars, number of stars (threshold for highlights to trigger star creation), angle of star rays, and length of rays. A little kitchy in practice (a little goes a long ways), but fun for some shots. |
 |  |
| Image overlay is another function that, while entertaining, can be a little hard to find applications for. | |
 |  |
| In-camera RAW processing is a feature we've seen on Nikon cameras for a little while now, but it deserves mentioning for its completeness: Pretty much any color or tone adjustment you could make when taking the original shot is available when developing NEF RAW files into JPEGs after the fact. Options include JPEG quality, image size, white balance, exposure compensation, and Picture Control. (Presumably including any adjustments you've made to the camera's individual Picture Control settings. | |
 |  |
| A new Quick Retouch option attempts to make basic color and tone adjustments to produce better-looking photos. The shot of the ugly vase above isn't an ideal example for this, was the best we had available when we were playing with the prototype. A better example would be a grey, misty day: This function would brighten it up, clear away some of the haze. | |
 |  |
| We're not sure what you might use image overlay for, but here's a feature we could use on far more of our shoots than we'd like to admit: A Straightening function that lets you rotate an image in small increments left or right. No excuses anymore for tilted horizon lines! | |
 |  |
| And speaking of useful, the Nikon D90 also lets you correct pincushion and barrel distortion (within limits) right on the camera's back panel. If you have a lens that the camera knows about (presumably most Nikkor lenses), the camera can correct the distortion automatically. | |
 |  |
| Back in the "more fun than useful" category, you can also apply a fisheye effect to your photos, post-capture. (By the way, note that all these post-capture effects create new images on the card, rather than modifying the original.) | |
HDMI Output
 Like the D3, D300, and D700, the new Nikon D90 provides for HTDV output via an HDMI 1.3 mini connector on its left side, hidden behind a rubber flap. If you've not yet joined the legions of HDTV users, there's also a conventional mini phone jack socket for conventional NTSC/PAL analog output.
GPS Option!
 Simultaneous with the announcement of the D90, Nikon is also announcing the GP-1, a new GPS accessory. The GP-1 is a little gadget that mounts on the hot shoe, and plugs into a new, dedicated GPS port on the side of the camera, using the GP1-CA90 accessory terminal cord. (While it's being announced with the D90, the GP-1 can also be used with the D3, D300, D700, D2x, D2xs, D2Hs, and D200 by plugging it into the 10-pin accessory terminal on those cameras, using the GP1-CA10 accessory terminal cord.) We haven't yet seen a sample of the GP-1, but it sounds relatively compact, at 1.97 x 1.79 x 1.00 inches (50 x 45.5 x 25.5mm). Power comes from the camera body, but we don't yet know how big an effect it will have on camera battery life. When operating, the GP-1 will copy latitude, longitude, altitude and time data into the EXIF headers of any image files captured. At this point, we have very little information on the GP-1 (including its projected price in the US), but one spec caught our eye: The GP-1 on average requires only 35 seconds for satellite acquisition, only 5 seconds from a hot start. That "hot start" seems tied to a setting on the setup menu for the GPS: You can apparently set it up to power-down whenever the camera's exposure meter shuts off. This could potentially save a lot of battery power, but at the relatively minor cost of needing to wait 5 seconds before snapping a shot after activating the camera's exposure meter, for the GPS unit to wake up. An interesting accessory, one we think will find a lot of application in various commercial, insurance, and governmental settings, where photos need to be authoritatively tagged with specific location information.
Nikon D90 Live View
The Nikon D90 brings Live View to that company's prosumer DSLR line for the first time (unless you consider the D300 a prosumer model; we class the D300 as a fully professional model). As we'll see though, it goes quite a bit beyond most Live View implementations, and in one respect, is absolutely unique as of the time of its introduction in late August, 2008.

One welcome enhancement to the Nikon D90's Live View mode is its one-touch activation, via the Live View button. On the D300, Live View mode had to be selected via the Drive Mode wheel on the left side of the camera's top panel; a somewhat cumbersome arrangement. By contrast, the D90 sports a LV button on its rear panel, in very convenient reach of your thumb. Press it at any time and the mirror flips up and the camera immediately enters Live View mode. A nice surprise, it does a lot to make Live View a much more fluid part of your photography than it's been in the past.
| Nikon D90 Live View Data Display |
 |
| The Nikon D90's Live View display includes a good bit of relevant shooting data, including shooting mode, autofocus mode, image size, image quality, white balance, audio recording, time remaining, metering mode, shutter speed/aperture, exposure compensation, ISO, and more. |
The second nice surprise in the Nikon D90's Live View mode was the full information display optionally available while working in that mode. The Live Mode shooting info display shows you a lot of what you'd normally see looking through the viewfinder, yet manages to keep most of the information out of the way of the live image area. Information displayed includes current metering mode, shutter time, aperture, exposure compensation, ISO setting, shots remaining, exposure mode, face detection active/inactive (more on this in a bit), file mode (RAW or JPEG) and white balance setting. It also shows microphone status and minutes/seconds of movie recording available at the current resolution and quality settings. (Wait a minute: Movie recording? Yes, that's not a typo, more on that in just a bit as well.) One thing we miss in the D90, though, is the live histogram display that's an option on the Nikon D3 and on some competing SLRs from Nikon's arch-rival Canon.
In a new wrinkle, the Nikon D90 has only one autofocus mode in Live View, and it's not the traditional phase-detect AF. The D90's only option for autofocus in Live View mode is contrast detection. This is a fairly radical departure for Nikon (or any camera maker).
By way of explanation, the phase-detect/contrast-detect distinction is one of the fundamental differences that separates digicams from digital SLRs, and is the core reason that SLRs focus so much more quickly. Contrast-detection autofocus involves looking at the image from a camera's main image sensor and evaluating it to see how abruptly brightness values change from one pixel to the next. If an image is soft and fuzzy, brightness changes between adjacent pixels will be relatively slight, but if it's sharply focused, they'll be much greater. The point of ideal focus is found by moving the lens elements back and forth and determining whether the contrast signal gets stronger or weaker. Achieving focus this way necessarily involves some back-and-forth hunting, which can take a while to accomplish. By contrast (no pun intended), phase-detect AF uses a system of prisms, lenses, and a secondary sensor to determine not only whether the image is in focus or not, but by how much it's out of focus and in which direction. The camera can then adjust the focus setting to exactly the position needed in a single step. As a result, phase-detect AF systems are generally much faster than contrast-detect ones.
The catch with phase-detect AF though, is that it requires some of the light passing through the lens to be diverted to the focus sensor. This is fine in an SLR when the mirror is down between exposures, as part of the mirror is typically partially transmissive, with the light passing through it deflected by a secondary mirror down to the AF sensor, usually located in the bottom of the mirror box. When the mirror is raised in Live View mode, though, light from the lens can't get to the separate AF sensor. This accounts for the rather lengthy (and noisy) AF cycles in most Live View SLRs: To focus the camera the mirror has to be dropped, focus determined, and the mirror raised again, adding several tenths of a second to the normal non-Live View shutter lag. For example, the Nikon D700 full-frame SLR has a shutter lag of only 0.197 second when using the optical viewfinder and a single AF point. This increases to 0.573 second in Live View mode, all other settings being the same.
While it takes some time for the mirror to drop and re-open for phase-detect AF in Live View mode, the overall result can still be faster than when relying on contrast-detect autofocus. Taking the case of the D700 again, in contrast-detect AF mode, it takes roughly 1.1 seconds for it to determine that the lens is in focus, even when starting with the lens already focused on the target. (It can easily take several seconds for the camera to slew a lens from infinity to close focusing in this mode.)
With the above as background, you can see why we were surprised to find contrast-detect AF the only autofocus option available on the D90 in Live View mode. In playing with a D90 prototype though, AF in Live View mode felt faster than we'd been expecting. Clearly, not nearly as fast as when using the optical viewfinder and phase-detect AF, but it certainly felt faster than the D700 (and D300 and D3) using their "Tripod Mode" (contrast-detect) AF in Live View. Alas, when we tested a production model D90 in the lab, we found that the overall shutter lag (from pressing the shutter button, through focusing, all the way to capturing the image) was still very much on the long side: The fastest times we measured, with the lens already set at the correct focal distance for the subject, was on the order of 2.3 seconds. So the D90's contrast-detect AF in Live View mode clearly isn't something you're going to be using for sports shooting.
| Nikon D90 Live View Autofocus | |
 |  |
| As shown here, one advantage of contrast-detect AF is that you can put the AF box wherever you like it. (In this case, we've put it top center.) When focus is locked, the focus box changes from red to green. | |
One advantage of contrast-detect autofocus though, is that you're not restricted to focusing only on those areas where you happen to have an AF point. As the pair of shots above shows, the D90 lets you put the focus box anywhere in the frame you want to when in Live View mode.
| Nikon D90 Live View Autofocus | |
 |  |
| Contrast-detect AF also opens the possibility of advanced modes like face-detection. Here, we see that the Nikon D90 will change both the location and size of the face-detect box to accommodate changes in subject size and position. | |

Face detection. Here's a look at the D90's face detection working with a live subject. Even in the prototype this was shot with, the camera had no problem tracking and locking onto a face as it moved around the scene. (Click to view/download 1.7MB MPEG-4 file.)
Besides the ability to position the AF area wherever you like it, the Nikon D90's contrast-detect AF in Live View mode also offers face detection and tracking. Up to 5 faces can be detected in an image, and the AF areas adjust to match the size of each face detected. The shots above show the AF box moving and changing size in response to the changing position and scale of a face in the scene. The face-detect box shows yellow when not in focus, and green when in focus (after half-pressing the shutter button). The video clip at right shows the D90 tracking a live face while zooming in and out and panning around.
Playing with face-detect autofocus in Live View mode, we were pleased to see that the camera not only tracked the faces, but was also intelligent enough to set focus based on the eyes of subjects, rather than on their noses or mouths. (In portrait work, the eyes are the most critical part of the face to render in sharp focus. Other parts of the face can be soft but viewers will regard the shot as properly focused if the eyes are crisp.)
Manual Focusing in Live View Mode
With appropriate magnification, Live View displays can be very useful when manually focusing SLR cameras. During manual focusing, the Live View display on the Nikon D90 can be magnified quite considerably, but it seems it's not quite all that you might expect from the specifications. In Live View mode, pressing the magnifying glass button on the camera's back lets you zoom in up to a maximum of 6.7x. If you do the math, this would correspond to a 1:1 (pixel to pixel) ratio between the pixels of the camera's very high-resolution LCD and the sensor. The viewfinder image at this magnification isn't sharp, though; it seems the camera is actually grabbing fewer pixels than that section of the sensor actually contains and then interpolating them to form the image. (You can check this by snapping a shot and then magnifying the resulting image to the same degree in playback mode. Doing this, you'll find the image is quite a bit sharper than what you saw on the LCD in Live View mode.) While the magnified Live View display is still usable for focusing, it isn't as sharp as it could be, nor as sharp as the Live View display on some of Canon's SLR models sporting this feature.
With appropriate magnification, Live View displays can be very useful when manually focusing SLR cameras. During manual focusing, the Live View display on the Nikon D90 can be magnified quite considerably, but it seems it's not quite all that you might expect from the specifications. In Live View mode, pressing the magnifying glass button on the camera's back lets you zoom in up to a maximum of 6.7x. If you do the math, this would correspond to a 1:1 (pixel to pixel) ratio between the pixels of the camera's very high-resolution LCD and the sensor. The viewfinder image at this magnification isn't sharp, though; it seems the camera is actually grabbing fewer pixels than that section of the sensor actually contains and then interpolating them to form the image. (You can check this by snapping a shot and then magnifying the resulting image to the same degree in playback mode. Doing this, you'll find the image is quite a bit sharper than what you saw on the LCD in Live View mode.) While the magnified Live View display is still usable for focusing, it isn't as sharp as it could be, nor as sharp as the Live View display on some of Canon's SLR models sporting this feature.
Nikon D90 Modes and Menus
Nikon D90 Exposure Modes
 The mode dial on the right side of the D90's top panel provides access to its various exposure modes, the same arrangement of Auto, three semi-auto, and one Manual as found on all Nikon DSLRs, but with a total of six Scene modes (which Nikon calls "Vari-Programs"). Note that the D80's Night Landscape Scene mode has been replaced by the D90's more useful Flash Off mode. Here's a list of what's available:
Auto: The camera sets everything. Used for snapshots or users who just don't want to be bothered with the details. The AF-assist light will come on if needed, and the camera selects the AF point covering the closest subject.
Program: Puts the camera in charge of aperture and shutter speed, though all remaining camera settings are available. You can vary the combination of aperture and shutter speed the camera has selected by rotating the Command Dial.
Shutter Priority: The user controls shutter speed, from 1/4,000 to 30 seconds, while the camera sets the aperture value.
Aperture Priority: The opposite of Shutter Priority mode, this mode lets the user control the aperture, while the camera sets the shutter speed.
Manual: Gives the user complete control over the exposure (both shutter and aperture settings), and provides access to the camera's Bulb shutter setting for exposures longer than 30 seconds.
Night Portrait: Uses slow shutter speed with flash, balancing the two so that night portraits look natural even with flash. Closest-subject AF is used. Use a tripod to avoid blurring.
Sports: Uses higher shutter speeds, camera switches to continuous focus while the shutter button is held down halfway, tracking the subject in the center focus area. If the subject leaves the central AF area, the camera will follow it and judge focus from the other focus areas. The beginning AF area can be chosen with the Multi-selector. Both flash and AF illuminator are turned off and will not fire.
Close up: Reds and greens are pumped up, camera selects center focus point, but other points can be chosen with the Multi-Selector. The built-in flash will pop up and fire if the lighting is too dim, use of a tripod is recommended.
Landscape: Boosts color saturation, contrast, and sharpening for city and forest landscape shots. Closest-focus AF is used, and the flash and AF-assist light are turned off in this mode.
Portrait: Adjusts the lens aperture to soften background details to help the main subject stand out more clearly. Sharpness and color saturation are moderated somewhat, to give softer, more natural-looking skin tones. The built-in flash will pop up and fire if the lighting is too dim.
Flash Off (Auto): In this mode, the flash is disabled, and the camera will vary the ISO up to a maximum of 3,200, to capture images using available light. The AF-assist light will come on if needed, and the camera selects the AF point with the closest subject. This mode is great for museums and other places where flash isn't permitted, more natural-looking indoor shots, etc. (Do note though, that you may need to use a tripod, as the shutter speeds are likely to be on the slow side, even at ISO 3,200.)
Nikon D90 Menus
The menu system on the D90 follows that of recent Nikons SLRs like the D60 and D300. Pressing the Menu button provides access to the camera's full menu system.
In the section below, rather than list and verbally describe each option, we'll present the top-level menu screens in the main text without comment, and provide links to pages showing most of D90 menu structure, page by page.
Nikon D90 Playback Menu

Nikon D90 full Playback menu layout
(note, large download for dialup users)
(note, large download for dialup users)
Nikon D90 Shooting Menu

Nikon D90 full Shooting menu layout
(note, large download for dialup users)
(note, large download for dialup users)
Nikon D90 Custom Settings Menu

Nikon D90 full Custom Settings menu layout
(note, large download for dialup users)
(note, large download for dialup users)
Nikon D90 Setup Menu

Nikon D90 full Setup menu layout
(note, large download for dialup users)
(note, large download for dialup users)
Nikon D90 "Retouch" Menu

Nikon D90 full "Retouch" menu layout
(note, large download for dialup users)
(note, large download for dialup users)
Nikon D90 "My Menu" Menu

Nikon D90 Autofocus System
The Nikon D90 uses the same Multi-CAM 1000 autofocus sensor as its predecessor the D80, but incorporates some of the advanced AE/AF integration first seen in the D3 and D300 professional models. It also offers 3D focus tracking for more accurate focus on moving subjects, the same technology found in its big brothers. In the paragraphs below, we'll look first at the general characteristics of the camera's AF system, and then talk a bit about the advances carried over from the D3 and D300.
Focusing Options
The D90 inherits the same Multi-CAM 1000 AF sensor module used in the D80, so many of its basic specs mirror those of the D80 quite closely. As we noted in the review section covering the viewfinder, the D90 has a total of 11 autofocus regions, arranged with 9 in an almost square matrix in the central area of the frame, with two additional ones positioned to the right and left of the central array. The central point of the array is a selectable normal/wide point, optionally able to look across a wider area in determining focus. Each of the 11 focus areas can be used individually, the center sensor can be switched to wide-frame operation for broader coverage, and an Auto-area AF mode measures all 11 focus areas, automatically determines which of them are on the primary subject and activates only those areas. As with the D80, only the center sensor is cross-type, able to respond to subject detail oriented either horizontally or vertically.
The D90 lets you choose either auto or manual focus via a small dial on the front of the camera, next to the lens. Setting the switch to "M" puts the camera into manual focus mode, "AF" places it in autofocus mode. Single AF (AF-S), Continuous AF (AF-C), and Auto-switching AF (AF-A) options can be selected by pressing the AF button on the right side of the camera's top panel repeatedly, to cycle through the choices. Single AF simply means that the camera sets focus only once, when the Shutter button is first pressed halfway, and is best for stationary objects. Continuous AF means that the camera continuously adjusts the focus, as long as the Shutter button is halfway pressed, and is best for moving objects. In AF Auto mode, the camera begins focus operations in single-focus mode, but switches to Continuous Dynamic AF if it detects motion within the active AF area.
There's an important difference between Single and Continuous Servo modes: In Single Servo mode, the shutter won't release unless the lens is focused, or the lens itself is set to manual focus. (Focus Priority) In Continuous Servo mode however, the camera will fire regardless of the state of focus. (Release Priority) If you want to be sure that the camera is focused when you snap the picture, use Single Servo mode. Use Continuous Servo for moving subjects, and/or times when the instant of shutter release is more important to you than sharp focus.
The AF Area Mode option (a1) on the Custom Settings Menu lets you select between Single Area, Dynamic Area, and Auto AF modes, and adds a new 3D Tracking mode, brought over from Nikon's recent pro-level SLRs. Single Area AF simply means that the camera judges focus based on one part of the subject, and the user can manually select the AF point by pressing the arrow keys. Dynamic Area AF employs all of the autofocus points, though you can still manually select the main point. When Dynamic Area focusing is enabled, the camera first focuses on the subject in the primary focus area. When the subject moves to a different AF area, the camera shifts the focus to "follow" the subject. This is great for irregularly moving subjects. (Sports and kids come to mind.) The Auto-area AF option means that the camera first focuses on the subject in whatever single AF area is selected, but will switch to Dynamic Area AF if it detects subject motion. The new 3D Tracking mode uses the 420-element RGB exposure/white balance sensor to aid in subject tracking. (See the section below on AE/AF integration for more details on this.)
In any of the AF modes, you can change the primary focus area by unlocking the focus area selector (the Four-Way Arrow pad on the back panel) and then shifting the focus area using the up, down, right, or left arrow directions on the control rocker. You can lock the focus area selection by turning the switch back to the lock position. By default, the D90 does not "wrap" the focus area selector as you scroll between focus areas. Custom Settings menu option a5 lets you opt for a "Wrap" function. What this means is that if you press the right arrow key again, after the right focus area is already selected, the selection will immediately jump to the left focus area. The same thing happens when moving the focus area selection vertically as well.
The center focus area of the D90 can be set to either a normal or wide zone, through Custom Settings Menu option a2. The wider zone could be better for initially acquiring a moving subject, particularly when combined with the Dynamic Focus option.
There are three methods by which you can lock focus on the D90. The first is to half-press the Shutter button to lock the focus, placing your subject in the selected focus area, halfway pressing the Shutter button, then realigning the composition and firing the shutter. (This is the default behavior of the Shutter button, but if the AE-L/AF-L button is set to AF Lock, it will override the shutter button as long as it's held down.) Alternatively, when using Single Servo AF, you can press the AF-L/AE-L button to lock focus (and exposure, unless that button is set for focus only in Custom Settings menu f4). Keeping this button pressed will lock focus and/or exposure, even if the Shutter button is released. This lets you recompose the photograph without keeping your finger on the Shutter button, but on the AE-L/AF-L button instead. (Reducing the chance that you'll accidentally trip the shutter when you don't intend to.) The front-panel FUNC button can also be set (via Custom Settings Menu option f3) to set focus temporarily.
There are several options available for the AE-L/AF-L button, which can be set via Custom Settings Menu f4. You can program it to lock either focus or exposure separately, or both together (the default). You can also change its operation so a single press locks and holds the exposure setting. (No need to keep the button pressed down.) Finally, you can set the AE/AF lock button so it alone controls the autofocus system, meaning the autofocus won't actuate when the shutter button is half-pressed, only when the AE/AF lock button is pressed instead.
AF Performance
We don't have any way to measure autofocus tracking performance directly, but on a subjective level, the AF system in the Nikon D80 did seem to be very fast and responsive. We particularly liked the Dynamic AF option, but could see where the Group Dynamic AF option of the D200 would be nice to have in some situations. (Group Dynamic AF handles the common situation where it's difficult to place a single AF point on a very active subject at the start of focus tracking. By having a larger area in which to position the subject, it becomes much easier to initially acquire focus.)
AF Assist
Like past Nikon DSLRs with built-in flashes, the D90's AF-assist light is a bright incandescent bulb that emits from the body near the handgrip. We thought to call particular attention to it, because some DSLRs use the flash as an AF-assist light. This would be fine, but they also require that the flash be used in the exposure, so there's no way to have AF assist for available-light shots. The D90 doesn't have this limitation.
AE/AF Integration - RGB sensor brings extra smarts
 When they were announced roughly a year before the Nikon D90, the D3 and D300 brought a new level of sophistication to autofocus algorithms, by taking advantage of information from their unusually high-resolution 1,005 RGB exposure and white balance sensor. For the first time, the D90 brings this advanced AF technology to a SLR aimed at the prosumer market. The technology isn't exactly equivalent to that of the higher-end models though: Where the D3 and D300 have 1,005 pixel RGB sensors, the equivalent chip in the D90 has only 420 pixels. - And, of course, the D90 has only 11 AF areas vs the 51 of the D3 and D300.
While 420 RGB pixels doesn't sound like a lot when compared to the megapixels of the main image sensor, that's a heck of a lot more elements than are found in the 11-point autofocus array. While AF systems have gotten pretty clever at understanding what the subject is doing as it moves across the frame and toward or away from the camera, a view that's limited to just 11 points severely restricts the camera's view of what's happening in terms of subject movement.
The key innovation in the D3/D300 AF system is that data from the RGB sensor is used to provide much higher resolution for keeping track of subject position. The color data also helps identify the subject of interest and separate it from the background or other scene contents. When an AF point initially acquires a lock on a particular subject, the camera immediately notes the pattern of light and color found at the corresponding point on the RGB array. Then, as the subject or camera moves, the camera can track the light/color pattern corresponding to the subject across the face of the RGB array. This provides much finer-grained position information than could ever be obtained from the sparse AF array. The RGB sensor doesn't provide any distance information, but by more precisely tracking subject information, it permits a much surer hand-off of the subject between AF points. Nikon calls this advanced, color-based approach 3D Focus Tracking. As noted above, 3D Tracking focus is one of the options on the a1 Custom Settings Menu screen.
Face Detection in Phase-Detect AF?
Here's a new wrinkle we were frankly a little surprised to hear about: The Nikon D90 can actually use face detection when in normal auto-area phase-detect AF mode. At first, this sounds like an impossibility, and it would be for a purely conventional phase-detect AF system. After all, how could the AF sensors tell whether they were focusing on a face or any other object? All they see is a signal that indicates how far in or out of focus their part of the subject is: There's nothing that would indicate what type of subject they're looking at.
This is where the 420-pixel RGB sensor comes into play again. It obviously doesn't have anywhere near the resolution of the main image sensor, but there's probably enough to give at least some idea of where a face might be in the image. We don't know the details of how the 420 pixels are arranged, but if they were in an array with a 3:2 aspect ratio to match the overall frame dimensions, that would be an array on the order of 25 x 17 pixels in size. Pretty paltry by camera image sensor resolution, but perhaps enough to detect a skin-colored blob against a differently-colored background. In closeup portraits, this is also probably enough resolution to figure out what part of the subject corresponds to an eye vs. a nose.
Of course, as noted before, the RGB sensor itself doesn't collect any distance information, and as such, can't directly control focus operation. In other words, you're still only going to be able to set focus based on areas covered by the AF points themselves. But what the RGB sensor data can do is to help the AF system decide which of the AF points to pay attention to.
Playing with a prototype of the Nikon D90, we found this to work surprisingly well. In auto-area AF mode, if we arranged objects to have several both covered by AF points and at equal distances from the camera, the camera pretty reliably chose the AF point lying over a face. Even more impressive, if we composed a portrait shot with several AF points on the subject's face, but only one over an eye, the camera picked the eye more times than not. (It seemed pretty accurate, but we'll have to spend more time with a production sample before we can give any idea of how reliable this AF system feature is. Nonetheless, what we saw struck us as both impressive and useful in actual shooting situations.
Nikon D90 Video
The Nikon D90's video capabilities are unusual enough (the first SLR to offer video recording) that we felt they deserved a page of their own, to cover them.
Resolution & Recording TimeThe Nikon D90's movie resolutions include 1280x720 (16:9), 640x424 (3:2), and 320x216 (3:2). Recording times are limited to five minutes per clip for HD mode, and 20 minutes per clip for the latter two modes. Nikon couldn't explain the reason for the limit as of this writing, but it's likely due to sensor heating issues that might start to degrade image quality. The frame rate is 24 frames per second, and audio is monaural, not stereo. Approximate maximum file sizes of the two larger sizes both seem to be about 600-800MB. The shorter maximum recording time of the higher resolution option seems to about balance the longer recording time of the lower resolution, producing the same size files overall. Nikon says that recording will stop at 2 GB even if it's been less than the 5 or 20 minute time limit in the various modes, but we never made a file larger than 800 MB, regardless of subject choice. (Subjects with lots of fine detail will produce larger images, as the fine detail is harder for the motion JPEG processing used in the D90 to compress.)
The Nikon D90's movie recording is accessed from Live view mode: You just press the OK button to start or stop recording at any time. You have to set focus before you start shooting your movie, but you can still focus manually and adjust the zoom setting of the lens while you're shooting. The movie will record the noise of the zoom ring to an extent, depending on which lens you're using and how fast you zoom, but it's still pretty impressive. Of course, one of the big advantages of being able to record movies with a Nikon SLR is that you have the full spectrum of Nikon lenses available to you, ranging from ultrawide angle and fisheye lenses all the way to ultra telephotos. You can also obviously use special lenses like the new LensBaby Composer for special effects. (While the D90's video is more oriented toward the making of quick "video snapshots," we can imagine some pros using it just to be able to incorporate special effects like the LensBaby look into their productions.)
Frame RateThe Nikon D90 captures images at 24 frames/second, the same frame rate used in the motion picture industry. This produces reasonably smooth motion, but we found that rapidly moving subjects close to the camera could look a little jumpy: The same as they do at your local cinema. If you've been using a digicam with a frame rate of only 15 frames/second (fairly common a generation or two back), the D90's 24 fps will be a welcome upgrade. On the other hand, if you've recently been using a digicam with 30 fps capture, you may find the D90's video a little jumpy. Once again, this probably isn't critical for "snapshot" videos, but another indication why the D90 really isn't a substitute for a dedicated camcorder.
FocusingPrior to recording, you can let the camera set focus via one of two ways: First, you could half-press the shutter button before switching to Live View mode. This will use the camera's normal autofocus system, which is quite fast. (As is typical of SLR phase-detect AF systems.) Alternately, most people will probably switch to Live View mode and do their initial framing before half-pressing the shutter button. This uses the D90's contrast-detect focusing mode, which is rather slow: Expect it to take two or three seconds, longer if it has to move the lens elements a lot.
The lack of autofocus during movie recording with the Nikon D90 is something that may give many potential owners pause, as focus is so critical in still photography and dealing with moving subjects would seem to make it even more so. In practice, we were surprised to find it not nearly the issue we expected it to be. This may be because the lower resolution in video mode greatly increases the effective depth of field: Subjects that would be well out of focus when shot at the D90's maximum still-image resolution of 12 megapixels often looked just fine when viewed at even the maximum video resolution of 1,280 x 720. Lower resolutions only increase this effect. And it's not just the resolution, either, the video compression introduces quite a bit of softness on a frame-by-frame basis, further masking softness due to defocusing.
Still, the Nikon D90's manual-only focusing in movie mode means that a whole new generation of non-professionals will now learn what it means to "pull focus" while recording movies, as the point of interest move from one subject to another, or if the subject moves significantly closer to or further from the camera during a segment. "Focus pulling" is a cinematic technique often performed by someone other than the camera operator, who is usually too busy framing the image to attend to focus as well. But millions of Nikon D90 owners will be able to try a technique that few camcorder owners can.
In our own admittedly limited playing with the Nikon D90's video recording, we found that pulling focus during a recording was a skill that required some learning, particularly if there were things going on in the scene that needed paying attention to. If we knew the approximate locations where the subject would be at the start and end of a clip (think of a video of a Little Leaguer sliding into home), we could check the corresponding positions of the focus ring and then try to repeat them while the action was taking place. This was a little hard to do with only a ring to grab onto, as the tactile reference for the different focus positions was pretty weak; a lever would have made the starting and stopping positions much more evident and easier to remember. As more SLRs capable of video recording get out into the market (Canon recently announced the EOS-5D Mark II, which also offers HD-resolution video recording), we suspect we'll aftermarket gadgets will appear that will let you temporarily attach a lever of some sort to lens focus rings, for just this purpose.
If you don't know in advance how the subject is going to move, you can try to judge focus from the image on the D90's rear-panel LCD and adjust accordingly. The exceptional resolution and sharpness of the LCD makes this more practical than it might sound. Once again, some practice (and inherently good reflexes) are required, but given enough practice, it could work reasonably well.
ExposureWhile not documented, it turns out you can control the aperture used for movies by selecting Aperture Priority or Manual exposure mode prior to entering Live View mode. Shutter speed and ISO sensitivity are always under the control of the camera. It appears that the D90's autoexposure during movie recording is performed by varying sensitivity and/or shutter speed in steps (1/3 EV?) rather than being continuously variable, which can lead to some abrupt, stepped changes in exposure. Only matrix metering is supported during movie capture, however exposure compensation can be adjusted up to +/- 3 EV while recording, and exposure can be locked using the AE-L/AF-L button. You can apply Nikon's Picture Controls as well as specify the color space for movies, as long as they are selected before recording begins. This is useful if you'd like to for instance record in monochrome, or with more saturated colors, etc.
AudioThe Nikon D90 has an internal microphone concealed behind three small holes on the front of the camera body. There is no provision for an external mic, nor do you have any control over the audio recording level: The camera's auto gain circuit (AGC) adjusts the mic sensitivity as needed to maintain a more or less constant recording level. We found the D90's microphone to be quite sensitive. It has no problem picking up even quiet conversation from across a room, as long as there are no background noises. Ah, but there's the rub: The mic will pick up all sorts of background noise if you're not careful. For a camera-mounted mic, there's not much else the engineers could do: The last thing you'd want in this case would be a mic with limited far-field pickup. Given that most users will likely be using the D90's video recording for short clips of memorable moments, its tendency to pick up every sound is probably a positive feature.
Rolling Shutter Artifact ("Jello Effect")
There was one aspect of the Nikon D90's video that we found less than wonderful, though, namely the way its progressive data readout from the sensor chip can produce distortions in the image when the camera or subject moves suddenly. The D90 records its movies at 24 frames/second, but the way it clocks data off its sensor chip means that it takes on the order of 1/24 second to read out each frame. By contrast, most camcorders grab each frame at a single moment in time, with all of the pixels in the image acquired simultaneously.
There was one aspect of the Nikon D90's video that we found less than wonderful, though, namely the way its progressive data readout from the sensor chip can produce distortions in the image when the camera or subject moves suddenly. The D90 records its movies at 24 frames/second, but the way it clocks data off its sensor chip means that it takes on the order of 1/24 second to read out each frame. By contrast, most camcorders grab each frame at a single moment in time, with all of the pixels in the image acquired simultaneously.
The consequence of this progressive capture is that any movement of the camera or subject between the beginning of a given frame's capture and the end of it will produce distortions in the shape of the image.
We first noticed this effect when panning rapidly to follow fast motion: Trees and buildings would lean opposite the direction of our panning. On the other hand, if you're panning slowly to take in a larger scene, you're not likely to notice the effect at all. More disconcerting, once we became sensitized to the phenomena, we noticed our video subjects "jiggling" slightly in response to even fairly minor camera shake as we were hand-holding the D90. Lens-based IS helps with this somewhat, but we'd be much happier if Nikon could figure out a way to grab the image data all at once and then read it off to the memory card before starting the next frame grab.
Video Examples: Dave shot some examples of video with the D90, so you can see what the different resolution levels look like. Click on any of the thumbnails below to bring up each video in a new window.
Nikon D90 Video Examples
Three Video Sizes
Options include 1,280 x 720, 640x424, and 320 x 216 pixels, all at 24 frames/second
(Click on any thumbnail to launch/download the movie in a new window)
Options include 1,280 x 720, 640x424, and 320 x 216 pixels, all at 24 frames/second
(Click on any thumbnail to launch/download the movie in a new window)
 | |
| 1,280 x 720 pixel video (but JPEG compression hides detail you'd see in that size still image) | |
 |  |
| 640 x 424 pixel video | 320 x 216 pixel video |
As noted earlier, the Nikon D90's video imagery is not only considerably lower resolution than its still images, but the heavy JPEG compression applied to the video frames further reduces detail. The upside of this is that the effective depth of field is quite a bit greater than you'd find in its still images at similar focal length and aperture. Note in some of the shots how little the apparent focus changes as wonder-dog Charlotte runs toward or away from the camera.
In the highest-res shot above, the lens was initially focused somewhere between Marti and the camera, so she's a little soft at the start of the clip. That said, I found it quite surprising how little apparent sharpness changed as Charlotte ran approached and receded from the camera.
Jello Effect
(Rolling Shutter Artifact)
Rapid camera motion can result in pretty severe distortion and apparent subject motion.
(Rolling Shutter Artifact)
Rapid camera motion can result in pretty severe distortion and apparent subject motion.
 |
| You wouldn't pan like this, but notice how even normal camera shake translates into subject jiggling. |
As mentioned earlier, the Nikon D90's "rolling shutter" can introduce pretty severe distortion in response to either camera or subject movement. The clip above is an extreme worst case: You'd probably never film with this kind of extreme camera motion, but it illustrates the nature of the problem pretty clearly. Notice how it's really not noticeable when panning slowly. Notice too, though, how even relatively minor hand movements at the end of the clip still create some distortion.
Pulling FocusManual focus while recording is challenging, but can be learned.
 |
| I wasn't quite quick enough to follow the butterfly here, but with practice, it shouldn't be too difficult to learn to pull focus for the D90's videos. |
I didn't have much time to devote to sharpening my focusing skills with the Nikon D90 in video mode. (Nor, for that matter, my skills in tracking small, rapidly moving subjects. :-) Nonetheless, this clip shows that it's not too difficult to focus based simply on what you're seeing on the D90's excellent, high-resolution LCD screen.
Nikon D90 Optics
Lenses
Like other Nikon SLRs, the D90 accommodates a wide range of Nikkor lenses, via the standard Nikon "F" lens mount. With very few exceptions, you can use the Nikon D90 with any F Mount Nikkor lens ever made, but older non-CPU lenses will significantly limit your exposure options. (Like the D80, the Nikon D90 lacks the "Non-CPU Lens Data" menu item found in Nikon's higher-end DSLRs, as well as the indexing finger the D300 has for wide-open metering with older "AI" lenses. If you have any AI lenses you want to be able to use the camera's metering system with, you should go with the D300 rather than the D90.)
Like other Nikon SLRs, the D90 accommodates a wide range of Nikkor lenses, via the standard Nikon "F" lens mount. With very few exceptions, you can use the Nikon D90 with any F Mount Nikkor lens ever made, but older non-CPU lenses will significantly limit your exposure options. (Like the D80, the Nikon D90 lacks the "Non-CPU Lens Data" menu item found in Nikon's higher-end DSLRs, as well as the indexing finger the D300 has for wide-open metering with older "AI" lenses. If you have any AI lenses you want to be able to use the camera's metering system with, you should go with the D300 rather than the D90.)
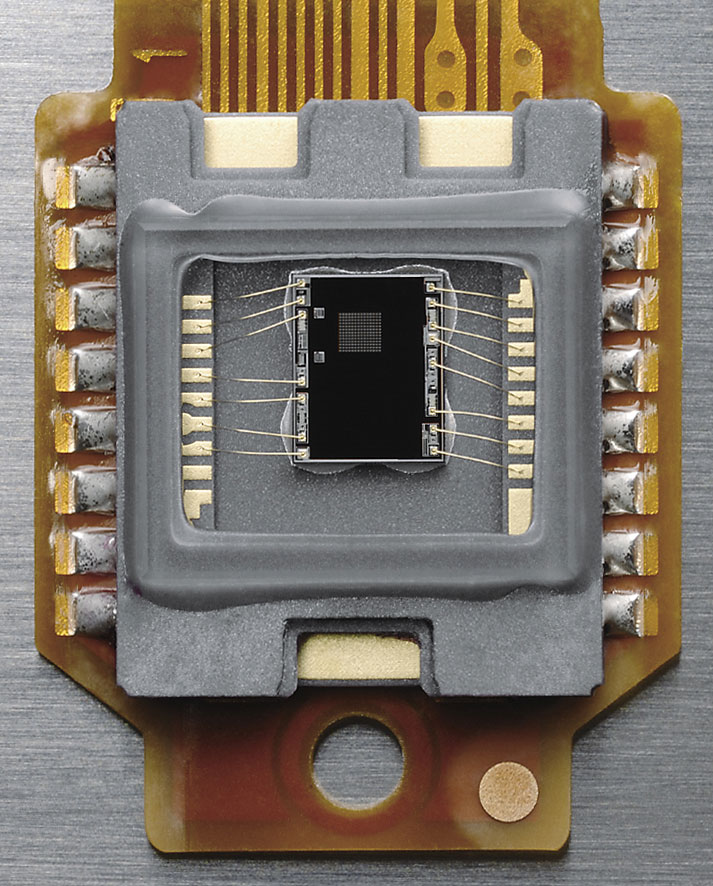
 New Kit Lens
As seems to becoming almost standard with Nikon, they've announced a new kit lens along with the D90. Their latest kit offering for the D90 is the AF-S DX 18-105mm f/3.5-5.6 G ED VR, with 15 elements in 11 groups one element using ED glass and one hybrid aspheric surface. (A hybrid aspheric lens consists of a normal spherical-section glass lens with a thin plastic layer bonded to it that provides a molded aspheric surface. They provide the benefits of aspheric surfaces (reduced distortion and aberration) at lower cost than all-glass aspherics.) Maximum aperture ranges from f/3.5-5.6 from wide angle to tele, while minimum aperture ranges from f/22-36.
The long list of alphabetic jargon in the lens's name deserves some translation for the non-Nikonians who might be reading this, so here it is:
- AF-S - "Silent Wave" (SWM) motor for fast, quiet focusing. This design also lets you adjust focus manually after the autofocus system has achieved focus, handy for manually tweaking focus to your liking in tricky situations.
- DX - designed to mate with Nikon's DSLRs, smaller and lighter because its image circle doesn't have to cover the full 35mmm film plane.
- 18-105mm - A fairly wide zoom range, 5.8x from wide to tele, equivalent to a 27-157.5mm lens on a 35mm camera.
- f/3.5-5.6 - A fairly average maximum aperture range, typical of most of Nikon's kit lenses.
- G - It has a CPU so it will work with Nikon's 3D Color Matrix Metering II system. The G also means no aperture ring, you set the aperture only through the camera's controls. Speaking of aperture, the diaphragm in this lens is a 7-blade rounded-opening design, for nice round catchlights and more appealing bokeh. (A more natural blur for out-of-focus objects.)
- ED - Uses Extraordinary Dispersion glass for better control of distortion, astigmatism, and chromatic aberration. As noted, there's also one aspheric surface, down from no fewer than 7 in the previous 18-135mm kit optic.
The new lens focuses quite closely, to a maximum repro ratio of 0.2x (1:5 macro), and accepts 67mm filters. This is a slightly reduced macro capability over the previous 18-135mm, which could get to 0.24x. It's nice that the lens takes a 67mm filter, that seems to be a fairly common size on Nikon's lenses, so you'll have a better chance of using the same filters on multiple lenses. As its VR designation indicates, this lens also incorporates Nikon's excellent Vibration Reduction (Image Stabilization) technology. The overall dimensions of the lens are 76mm diameter by 89mm long, and it weighs in at 420 grams. This lens adds $300 to the price of the body when purchased as a kit, but will cost $485 when purchased alone.
The new kit lens felt very nice in the hand. It zoomed smoothly, focused quickly, and construction was solid and tight. Optical performance was quite good, and VR is a welcome addition. Along with the test results presented below, see our full review of the Nikkor 18-105mm VR lens on our sister site, SLRgear.com.
Lens Compatibility
As noted above, functions and exposure modes available with a given lens will vary greatly with the lens type. More recent Nikkors (the G- or D-type models) include a microchip (CPU) that communicates focal-distance information to the camera. Lenses without the microchip won't support the 3D Matrix metering mode, and in fact all metering is disabled on the D90 when using a non-CPU lens. Most non-CPU lenses can be attached to the camera, but the shutter release will be disabled unless the camera is in Manual exposure mode, and AF, metering, electronic analog exposure display and TTL flash control can't be used.
As noted above, functions and exposure modes available with a given lens will vary greatly with the lens type. More recent Nikkors (the G- or D-type models) include a microchip (CPU) that communicates focal-distance information to the camera. Lenses without the microchip won't support the 3D Matrix metering mode, and in fact all metering is disabled on the D90 when using a non-CPU lens. Most non-CPU lenses can be attached to the camera, but the shutter release will be disabled unless the camera is in Manual exposure mode, and AF, metering, electronic analog exposure display and TTL flash control can't be used.
For complete lens-compatibility information, see the tables below (courtesy of Nikon):


Kit Lens Test Results
Zoom
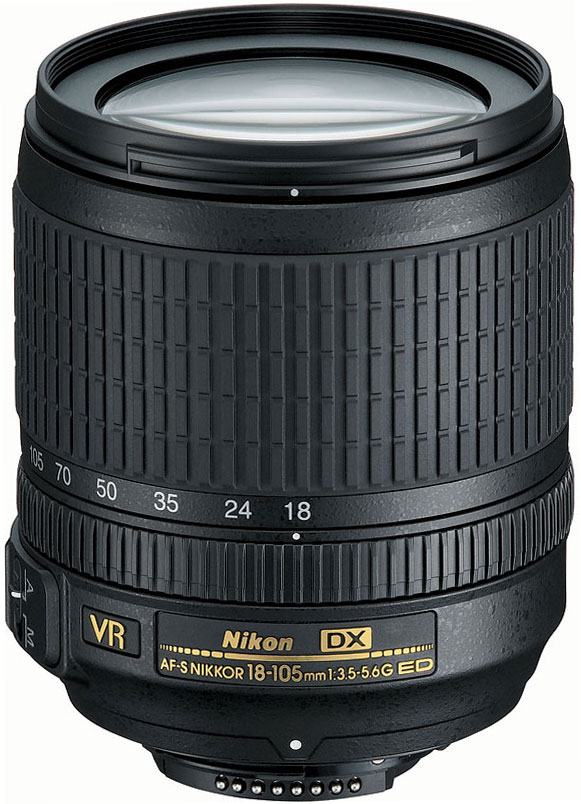
Very good performance with the 18-105mm VR (Vibration Reduction) kit lens.
Very good performance with the 18-105mm VR (Vibration Reduction) kit lens.
 |  |
| 18mm | 105mm |
The Nikon D90 digital SLR accommodates a wide range of Nikkor lenses. Here, we tested the performance of the new 18-105mm VR kit lens, which has a fairly generous (for a kit lens) optical zoom range of ~5.8x. Details are very good at wide angle, with better-than-average corner-to-corner sharpness (only slight softness in the extreme corners) and relatively low levels of coma distortion and blurring in the corners. Chromatic aberration is also quite low for a long ratio zoom (see below for why). Results at full telephoto are also very good, with good sharpness across the frame and very low levels of chromatic aberration, though pin-cushion distortion is quite evident. All in all, the Nikkor 18-105mm VR, does very well for a kit lens on a 12-megapixel sensor, and the added image stabilization will come in handy for low-light shooting.
Macro
A average area (for an SLR kit lens), with good detail. Flash throttles down well.
A average area (for an SLR kit lens), with good detail. Flash throttles down well.
 |  |
| Standard Macro with 18-105mm VR Kit Lens | Macro with Flash |
As with zoom performance, the Nikon D90's macro performance will depend entirely on the lens in use. However, with the 18-105mm VR kit lens set to 105mm, the D90 captured a fairly average minimum area (for a non-macro, long zoom SLR lens) measuring 4.23 x 2.81 inches (107 x 71 millimeters). Resolution is high, though details are a little soft overall, even at the center of the frame, with moderate softening in the corners. (Most lenses have some softening in the corners at macro distances.) The Nikon D90's flash throttled down for the macro area pretty well, and there was no detectable shadow from the lens barrel, resulting in a good exposure with the flash.
Distortion
Moderately high geometric distortion with the 18-105mm VR kit lens.
Moderately high geometric distortion with the 18-105mm VR kit lens.
| Barrel distortion at 18mm is 1.1 percent |
 |
| Pincushion at 105mm is 0.5 percent |
 |
The Nikon D90's 18-105mm VR kit lens produced about 1.1 percent barrel distortion at wide-angle, which is higher than average among the cameras we've tested, and noticeable in its images. At the telephoto end, the 0.5 percent pincushion distortion is also above average and quite noticeable. This is the tendency for the lens to bend straight lines outward (like a barrel -- usually at wide-angle) or inward (like a pincushion -- usually at telephoto).
Chromatic Aberration
Very low in camera JPEGs, but moderately high at wide-angle in RAW files with the 18-105mm VR kit lens.
Very low in camera JPEGs, but moderately high at wide-angle in RAW files with the 18-105mm VR kit lens.
 |  |
| Wide: Very low and dull, top left @ 200 percent, in-camera JPEG | Wide: Very low and dull, top right @ 200 percent, in-camera JPEG |
 |  |
| Tele: Very low and dull, top left @200 percent, in-camera JPEG | Tele: Very low and dull, top right @200 percent, in-camera JPEG |
Chromatic aberration in the corners of camera JPEGs taken with the Nikon D90's kit lens is extremely low, and hardly noticeable at either wide angle or full telephoto. So low in fact, that it made us wonder if the D90 was correcting for it, even though Nikon hasn't advertised chromatic aberration correction as a feature for the D90. (This distortion is visible as a slight colored fringe around the objects at the edges of the field of view on the resolution target.)
RAW Files
As we suspected, there were moderate to high levels of C.A. in the corners of converted RAW files. So, it turns out the Nikon D90 does indeed compensate for lateral chromatic aberration in its JPEGs, just like its big brothers: the D3 and D300. As mentioned above, this feature was not listed in any of the pre-release D90 info received, nor was it mentioned on the Nikon USA website at the time of this writing. We were pleasantly surprised, to say the least.
As we suspected, there were moderate to high levels of C.A. in the corners of converted RAW files. So, it turns out the Nikon D90 does indeed compensate for lateral chromatic aberration in its JPEGs, just like its big brothers: the D3 and D300. As mentioned above, this feature was not listed in any of the pre-release D90 info received, nor was it mentioned on the Nikon USA website at the time of this writing. We were pleasantly surprised, to say the least.
 |  |
| Wide: High and quite bright, top left @ 200 percent, converted RAW file | Wide: High and quite bright, top right @ 200 percent, converted RAW file |
 |  |
| Tele: Moderate, top left @ 200 percent, converted RAW file | Tele: Moderate, top right @ 200 percent, converted RAW file |
Chromatic Aberration Reduction. As noted, the anti-CA system in the D90 seems to work identically to that in the D3 and D300. The crops above were taken from the corners of converted RAW files with the D90 and the new 18-105mm VR kit lens. It's a very good kit lens for the price, but there's some moderate to strong CA in the corners, as can be seen clearly in RAW files, as above.
In the previous set of in-camera JPEGs, you can still see a tiny amount of coloration along the vertical edges of the bold black bar, but that's really splitting hairs: For all intents and purposes, the chromatic aberration is gone. (Note that the anti-CA processing is only applied to the in-camera JPEGs; the camera very rightly leaves the RAW files untouched.)
It's important to note that this CA correction isn't dependent on your using a Nikon lens: The camera figures out how much CA there is in each area of the image, and shifts the planes of red and blue pixel data to compensate for it. Note, though, that this only works for lateral CA.Longitudinal chromatic aberration isn't corrected out. (Happily, with most good quality lenses, lateral CA is much more common than longitudinal.)
Corner Sharpness
Slight blurring in the corners of the frame at both zoom settings with the kit lens.
Slight blurring in the corners of the frame at both zoom settings with the kit lens.
 |  |
| Wide: Slightly soft in the corners (upper left). | Wide: Sharper at center. |
 |  |
| Tele: Slightly soft in the corners (upper left). | Tele: Sharper at center. |
The Nikon D90's 18-105mm VR kit lens produced slightly soft corners in a few shots. At wide angle, corners on our test targets had a little softness compared to the center. At telephoto, corner softness was similar, but still much less than average for a kit lens. A very good performance here, especially considering these shots were taken at maximum aperture (corner softness usually improves when the lens is stopped-down a few f-stops). Impressive results for a 5.8x zoom kit lens.
Nikon D90 Exposure
Nikon D90 Exposure/Capture Enhancements
The Nikon D90 offers a number of advancements over its predecessor the D80. We'll mention them here, and then discuss some of them in more detail below.
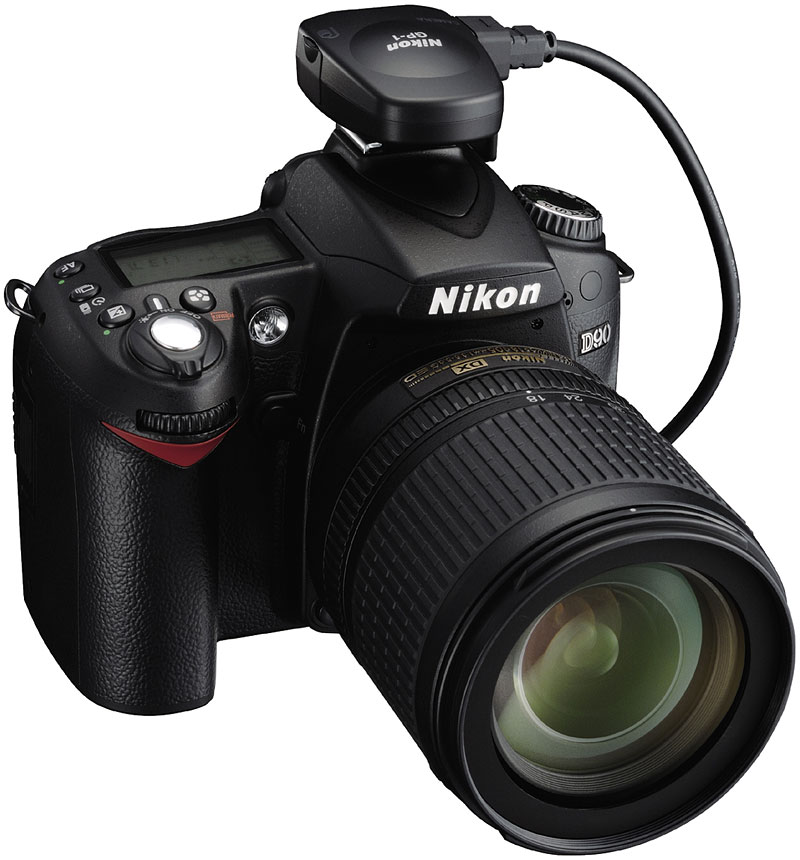
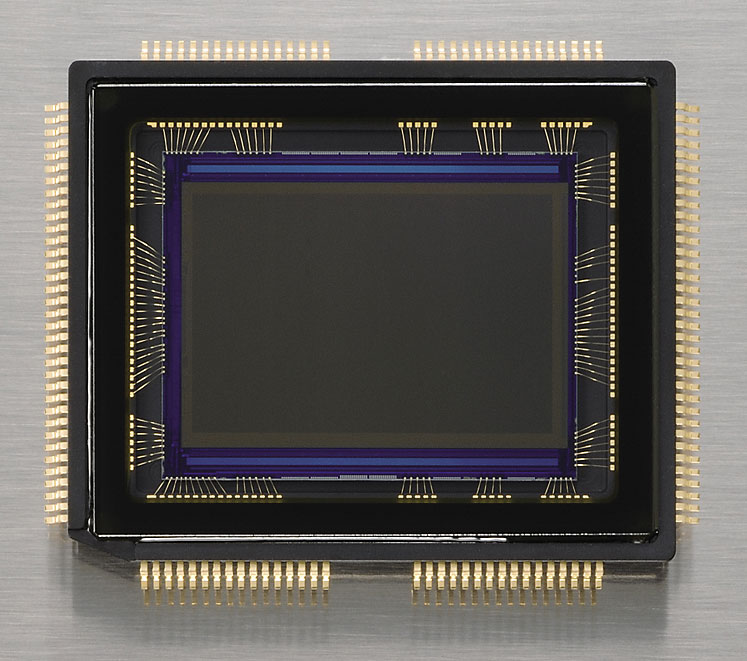 12-megapixel sensorThe Nikon D90's 12.3 megapixel sensor isn't exactly a quantum leap beyond the D80's 10.1-megapixel chip, but a little extra resolution is always welcome. - As long as it doesn't bring higher image noise along with it. Nikon claims new, more advanced noise reduction processing on the D90; if so, the extra two megapixels of resolution will be a nice addition. Indicative of Nikon's confidence in their new noise-reduction algorithms is the D90's higher ISO range of 200-6,400. (The D80 ranged from ISO 100 to 3,200.) Like the D80 though, the D90's sensor and A/D system delivers 12 bits of raw image data, vs the 14 bits of the D300 and other higher-end Nikon DSLRs.
 High-endurance shutter mechanismLike most consumer-level DSLRs, the D80's shutter carried no rating for total lifetime cycles. For the D90 though, Nikon is rating its shutter at 100,000 cycles. This isn't quite to the 150,000 to 300,000 cycle ratings of some pro-grade SLRs, but it's a pretty substantial number nonetheless. An explicit shutter lifetime rating is a first for Nikon in a consumer or prosumer-level SLR, and speaks well for the D90's long-term durability.
New, highly advanced exposure system
When they were announced in late August, 2007 (almost exactly a year ahead of the D90), the D3 and D300 marked a significant advance in exposure metering technology. Nikon's 3D Matrix Metering had long been an industry standard for exposure accuracy when faced with tough subjects and difficult lighting conditions, but the D3/D300's system took Matrix Metering to a new level. Changes in the optical path for their 1,005 element RGB exposure/white balance sensor greatly improved scene-recognition accuracy. This technology has now been brought forward to the Nikon D90. Although its RGB exposure/white balance sensor has fewer elements (420 vs 1,005), this improved scene-recognition technology promises improved exposure accuracy for the D90, beyond the already-excellent performance of the D80.
When they were announced in late August, 2007 (almost exactly a year ahead of the D90), the D3 and D300 marked a significant advance in exposure metering technology. Nikon's 3D Matrix Metering had long been an industry standard for exposure accuracy when faced with tough subjects and difficult lighting conditions, but the D3/D300's system took Matrix Metering to a new level. Changes in the optical path for their 1,005 element RGB exposure/white balance sensor greatly improved scene-recognition accuracy. This technology has now been brought forward to the Nikon D90. Although its RGB exposure/white balance sensor has fewer elements (420 vs 1,005), this improved scene-recognition technology promises improved exposure accuracy for the D90, beyond the already-excellent performance of the D80.
Active D-Lighting
D-Lighting is Nikon's name for their technology that balances exposure in highlights and shadows. On the D80 D-Lighting was a Retouch menu option, where it could be applied to images after they were captured. On the D3 and D300, the new D700, and now on the Nikon D90, D-Lighting is still an option on the Retouch menu, but can also be found on the Shooting menu as Active D-Lighting. Active D-Lighting does the same things D-Lighting has always done (typically, holding back highlights slightly, while boosting shadow brightness), but now does it on the fly, at the moment of capture. On the D90, though, Active D-Lighting's capabilities are expanded beyond those of the previous pro cameras through the addition of the Extra High option. (The pro cameras' Active D-Lighting options include Off, Low, Normal, High, and Auto.) Nikon told us that the advanced scene recognition used in the exposure system also informs the Active D-Lighting system, particularly in photos containing people's faces.
D-Lighting is Nikon's name for their technology that balances exposure in highlights and shadows. On the D80 D-Lighting was a Retouch menu option, where it could be applied to images after they were captured. On the D3 and D300, the new D700, and now on the Nikon D90, D-Lighting is still an option on the Retouch menu, but can also be found on the Shooting menu as Active D-Lighting. Active D-Lighting does the same things D-Lighting has always done (typically, holding back highlights slightly, while boosting shadow brightness), but now does it on the fly, at the moment of capture. On the D90, though, Active D-Lighting's capabilities are expanded beyond those of the previous pro cameras through the addition of the Extra High option. (The pro cameras' Active D-Lighting options include Off, Low, Normal, High, and Auto.) Nikon told us that the advanced scene recognition used in the exposure system also informs the Active D-Lighting system, particularly in photos containing people's faces.
 |  |
| No D-Lighting | D-Lighting |
These shots from the D60 show Active D-Lighting at work on the D60. Here, the terribly blown-out background is held at least somewhat in check, while midtones are smoothed out a bit. You still need to decide when to use it or not: In this case we might have wanted to blow out the background, to emphasize the subject more. It will be interesting to try a shot like this on the Nikon D90, to see if the face-detection in its exposure system would cause it to push the exposure a bit more on Marti's face.
| |
We didn't get a chance to play with Active D-Lighting on the Nikon D90, but have been quite impressed by it on the D3, D300, and D700. We're generally not fans of cameras' monkeying with contrast and tonality on their own, but have to admit that Nikon's Active D-Lighting gets it right more often than not (to our eyes, at least). We also like that it leaves the NEF RAW files completely alone (its effects are only applied to in-camera JPEGs), so we always have an undisturbed original to tweak manually if we don't like what D-Lighting did with a subject.
| Nikon D90 Active D-Lighting Options | |
 |  |
| Active D-Lighting appears on the Nikon D90 for the first time in a consumer DSLR. | As with several other features, Active D-Lighting on the D90 has been enhanced even over what's available on recent Nikon pro models. The Extra High option is new with the D90. |
Another nice feature: Active D-Lighting can be "bracketed" on the D90. Not in the usual sense of bracketing involving shooting with a range of settings (low, normal, and high, for example), but rather by simply grabbing one shot with Active D-Lighting off, and one with whatever setting you've chosen for it. If you're like us, and mistrust in-camera tonal tweaking, this is a very reassuring feature, and one that makes it more likely we'd use Active D-Lighting routinely.
Database-driven white balance
The D80 and D90 share the same 420-element RGB exposure/white balance sensor, but how they use is quite different. We mentioned above the new exposure system that uses the RGB sensor data for more accurate scene detection, letting it better match the exposure conditions it sees to its 30,000-image exposure database. The D90's different usage of RGB sensor data doesn't end with exposure determination though. Where the D80's white balance system uses the RGB sensor data to make a fairly conventional evaluation of color temperature, the D90 combines the RGB sensor's overall color information with the results of its scene matching to do a more intelligent job of light source identification. Beyond simply identifying the light source though, the scene database information can provide very direct information about the target color balance. One example of this is portrait shots: When the scene database recognizes that a portrait is being shot, its identification of the subject's face gives the white balance system a known color target. The actual color of the face in the scene then gives very direct information about the sort of light source illuminating it, letting the camera make a much more educated guess about its characteristics.
The D80 and D90 share the same 420-element RGB exposure/white balance sensor, but how they use is quite different. We mentioned above the new exposure system that uses the RGB sensor data for more accurate scene detection, letting it better match the exposure conditions it sees to its 30,000-image exposure database. The D90's different usage of RGB sensor data doesn't end with exposure determination though. Where the D80's white balance system uses the RGB sensor data to make a fairly conventional evaluation of color temperature, the D90 combines the RGB sensor's overall color information with the results of its scene matching to do a more intelligent job of light source identification. Beyond simply identifying the light source though, the scene database information can provide very direct information about the target color balance. One example of this is portrait shots: When the scene database recognizes that a portrait is being shot, its identification of the subject's face gives the white balance system a known color target. The actual color of the face in the scene then gives very direct information about the sort of light source illuminating it, letting the camera make a much more educated guess about its characteristics.
Here again, we'll have to wait for a production-level sample of the Nikon D90 to see how well this more advanced white balance system works. The real test will be how well it handles people shots under household incandescent lighting. The D80's auto white balance system (and those of most other DSLRs) does rather poorly under incandescent lighting. It will be interesting to see how the D90's white balance system handles difficult light sources; this could be an area of real differentiation between it and competing DSLRs.
Extensive Picture Control options
The D80 provided for user manipulation of the camera's imaging characteristics via the Optimize Image menu we'd seen over several generations of Nikon DSLRs now. More recently, Nikon has moved toward a Picture Control menu, as seen in their recent professional models. For the first time, the Nikon D90 will bring the Picture Control menu to a consumer DSLR, and with a few new options thrown in for good measure. The table below shows some of the new features:
The D80 provided for user manipulation of the camera's imaging characteristics via the Optimize Image menu we'd seen over several generations of Nikon DSLRs now. More recently, Nikon has moved toward a Picture Control menu, as seen in their recent professional models. For the first time, the Nikon D90 will bring the Picture Control menu to a consumer DSLR, and with a few new options thrown in for good measure. The table below shows some of the new features:
| Nikon D90 Picture Control Menu Options | |
 |  |
| Set Picture Control takes the place of Optimize Image on the Nikon D90's Shooting Menu. | Previous models only had options for Standard, Neutral, Vivid, and Monochrome. The Nikon D90 adds Portrait and Landscape mode. Portrait and Landscape modes invoke color tweaks to favor their respective subjects. |
 |  |
| Where the D80's Optimize Image control provided only a single set of image adjustments, you can tweak image settings for each of the Picture Control options independently of each other. | This is a neat display (reached by pressing the Thumbnails button to the left of the LCD while in the Picture Control menu): It gives a quick, at-a-glance view of where each of the Picture Control options is currently set, in terms of contrast and saturation. |
 |  |
| In Monochrome Picture Control menu lets you choose color filters to apply before capture, just as you might have chosen color filters in B/W film days (a yellow filter for dramatic cloud/sky shots, for instance). You can also choose from among a number of hues to tone the resulting image with. (Thankfully including just plain black & white.) | Once you have a set of Picture Control tweaks dialed in just the way you want them, you can save it as a custom Picture Control option. A number of such custom presets can be saved. You can also load/save settings from/to the memory card, so you can easily set up a number of bodies with identical Picture Control options. |
"Smart" Exposure Program recognizes VR on/off
This is a minor point, but typical of the thoughtfulness Nikon applies to their cameras' operational details: When the D90 detects that a VR (Vibration Reduction) lens is attached, it automatically adjusts the program line of the exposure system to permit longer exposure times under dim lighting. With a VR lens attached, you'll thus be able to shoot at slower shutter speeds before the camera will want to pop up its flash. Slick.
This is a minor point, but typical of the thoughtfulness Nikon applies to their cameras' operational details: When the D90 detects that a VR (Vibration Reduction) lens is attached, it automatically adjusts the program line of the exposure system to permit longer exposure times under dim lighting. With a VR lens attached, you'll thus be able to shoot at slower shutter speeds before the camera will want to pop up its flash. Slick.
Nikon D90 Performance
Timing and Performance
Excellent speeds for a prosumer digital SLR.
Startup/Shutdown
| ||
Power on
to first shot | 0.3 second |
Time it takes to turn on and capture a picture. (Short enough that it's hard to measure.)
|
Shutdown
| 0.4 second |
How long it takes camera to turn off before you can remove the memory card.
|
Buffer clearing time
| 4 seconds after 20 large/fine JPEGs* |
Worst case buffer clearing time. -- This is the delay after a set of shots before you can remove the card.
|
| 1 second after 20 small/basic JPEGs* | ||
| 6 seconds after 10 RAW files* | ||
| 9 seconds after 7 RAW+JPEG files* | ||
*Note: Buffer clearing times measured with a SanDisk Extreme III SD card. Slower cards will produce correspondingly slower clearing times. Slow cards may also limit length of bursts in continuous mode. ISO sensitivity and noise reduction settings can also affect cycle times and burst mode performance.
| ||
Fast startup and shut-down times, fast enough that they're difficult to measure. Buffer clearing times are quite good, but depend on the image quality, size and speed of the memory card.
| Mode Switching | ||
|---|---|---|
Play to Record,
first shot | 0.3 second |
Time until first shot is captured.
|
Record to play
| 0.6 second |
Time to display a large/fine file immediately after capture.
|
Display
recorded image | 0.3 second |
Time to display a large/fine file already on the memory card.
|
Mode switching times are very good.
| Shutter Response (Lag Time) | ||
|---|---|---|
Full Autofocus
Single-point AF Optical Viewfinder | 0.208 second |
Time from fully pressing shutter button to image capture. All AF timing measured with Sigma 70mm f/2.8 Macro lens. (Slower, gear-driven focus, but cameras seem to be able to determine focus speed very quickly with this lens.)
|
Full Autofocus
Single-point AF iTTL flash enabled Optical Viewfinder |
0.249 second
|
Time to capture while forcing flash to fire. (Metering pulses from flash sometimes slow shutter response.)
|
Full Autofocus
Auto-Area AF Optical Viewfinder | 0.270 second |
Time from fully pressing shutter button to image capture.
|
Prefocused
Optical Viewfinder | 0.067 second |
Time to capture, after half-pressing and holding shutter button.
|
Continuous AF
Optical Viewfinder |
0.074 second
|
This mode usually shows no speed increase with our static subject; we have no way to measure performance with moving subjects.
|
Manual Focus
Optical Viewfinder |
0.067 second
|
For most cameras, shutter lag is less in manual focus than autofocus, but usually not as fast as when the camera is "prefocused".
|
Full Autofocus
Live View |
2.294 seconds
|
Time from fully pressing shutter button to image capture, using contrast-detect autofocus in Live View mode.
|
Prefocused
Live View |
0.519 second
|
Time to capture, after half-pressing and holding shutter button, in Live View mode.
|
Full autofocus shutter response is very good at 0.208 second, slightly faster than the D80. Enabling the built-in flash increased full AF lag just slightly to 0.249 second: That small an increase is excellent. "Prefocusing" the camera by half-pressing and holding down the shutter button before the final exposure results in a lag time of only 0.067 second, also a bit faster than the D80. Manual focus was just as fast as prefocused.
Lag times in Live View mode are quite a bit (a lot) slower, as only contrast-detect AF is supported on the D90 (unlike the D300, which also has a phase-detect Live View AF mode). Full AF in Live View required a very long 2.3 seconds to achieve focus. (Contrast-detect AF needs to adjust the lens slightly out of focus first, then back in again, to be able to tell that it's achieved proper focus.) Lenses with fast focus motors seem to make only a minor difference. When prefocused, Live View shutter lag is much faster at 0.519 second, but still almost 8x slower than using phase-detect AF with the optical viewfinder.
| Cycle Time (shot to shot) | ||
|---|---|---|
Single Shot mode
Large/Fine JPEG | 0.36 second |
Time per shot, averaged over 20 shots, 1.5 seconds to clear.
|
Single Shot mode
Small Basic JPEG | 0.50 second |
Time per shot, averaged over 20 shots, 1 second to clear.
|
Single Shot mode
RAW | 0.35 second |
Time per shot, averaged over 13 shots, 6 seconds to clear.
|
Single Shot mode
RAW + Large/Fine JPEG | 0.32 second |
Time per shot, averaged over 6 shots, 8.5 seconds to clear.
|
Early shutter
penalty? | No |
Some cameras don't snap another shot if you release and press the shutter too quickly in Single Shot mode, making "No" the preferred answer.
|
Continuous mode
Large Fine JPEG | 0.22 second (4.50 frames per second); 20+ frames total; 4 seconds to clear* |
Time per shot, averaged over 20 shots (buffer capacity was more than 20 shots)
|
Continuous mode
Small Basic JPEG | 0.22 second (4.56 frames per second); 20+ frames total; 1 second to clear* |
Time per shot, averaged over 20 shots (buffer capacity was more than 20 shots)
|
Continuous mode
RAW | 0.24 second (4.13 frames per second); 10 frames total; 6 seconds to clear* |
Time per shot, averaged over buffer length of 10 frames
|
Continuous mode
RAW + Large Fine JPEG | 0.24 second (4.23 frames per second); 7 frames total; 9 seconds to clear* |
Time per shot, averaged over buffer length of 7 frames
|
Flash recycling
| 2.2 seconds |
Flash at maximum output.
|
*Note: Buffer clearing times measured with a SanDisk Extreme III SD card. Slower cards will produce correspondingly slower clearing times. Slow cards may also limit length of bursts in continuous mode. ISO sensitivity and noise reduction settings can also affect cycle times and burst mode performance.
| ||
Shot-to-shot cycle times in single-shot mode were quite fast, at 0.36 second for large/fine JPEGs, 0.35 second for RAW frames, and, oddly only 0.32 second for RAW + LF JPEGs. We questioned the slight differences between modes, as we'd normally expect RAW+JPEG to take longer than JPEG alone, but for whatever reason, there was a lot of variation in the cycle times for the JPEG large/fine case, giving a standard deviation of +/- 0.07 second, or 20%. We also hit some significant slowdowns after 6 shots of our very hard-to-compress noise target, indicating a worst-case buffer capacity of 6 shots for RAW+JPEG mode. In JPEG-only modes, the camera captured a full run of 20 shots without having to slow for buffer clearing, while RAW-only slowed after 13 frames.
Continuous mode speeds are also quite good, our measured speeds coming in at around the camera's rated 4.5 frames/second for JPEGs, a little slower for RAW (4.13 frames/second for RAW and 4.23 frames/second for RAW + JPEG). Measured buffer depths were more than 20 frames for large/fine JPEGs, 10 frames for RAW mode and 7 frames for RAW+JPEG. (Note that in our cycle time testing we shoot a target consisting of a fine-grained digital noise pattern, designed to be very hard to compress. This gives us worst-case buffer capacity numbers: You're likely to see greater buffer capacity when shooting more normal subjects.)
The flash took about 2.2 seconds to recharge after a full-power pulse, which is very fast.
| Download Speed | ||
|---|---|---|
Windows Computer, USB 2.0
| 6,327 KBytes/sec |
Typical Values:Less than 600=USB 1.1;
600-769=USB 2.0 Low; Above 770=USB 2.0 High |
Connected to a computer or printer with USB 2.0, download speeds are very fast.
Bottom line, the Nikon D90 is pretty fast in just about every aspect of its operation, improving on the D80's speed in virtually every respect, despite the increase in resolution. Continuous modes are fast enough for most moving subjects, and shutter lag and cycle times are pretty fast as well. The one exception is autofocus in Live View mode: It's definitely not a "sports" mode.
Battery and Storage Capacity
Battery
Excellent battery life for a lithium-ion SLR design.
Excellent battery life for a lithium-ion SLR design.
| Operating Mode | Number of Shots |
|---|---|
Lithium-ion Rechargeable Battery,
(CIPA standard, Optical Viewfinder) |
850
|
The Nikon D90 uses a custom rechargeable lithium-ion battery for power, and ships with a charger. Although battery life is quite good, we recommend you pick up a spare battery and keep it freshly charged and on-hand for extended outings.
The table above shows the number of shots the camera is capable of (on a fully-charged rechargeable battery), based on CIPA battery-life and/or manufacturer standard test conditions.
(Interested readers can find an English translation of the CIPA DC-002 standards document here. (180K PDF document))
Storage
The Nikon D90 accepts SD or SDHC memory cards, and does not ship with a card.
The Nikon D90 accepts SD or SDHC memory cards, and does not ship with a card.
| Image Capacity with 1GB Memory Card | Fine | Normal | Basic | RAW | RAW + L/F JPG | |
|---|---|---|---|---|---|---|
4,288 x 2,848
|
Images
(Avg Size) |
137
7.5 MB |
271
3.8 MB |
534
1.9 MB |
67
15.3 MB |
45
22.8 MB |
Approx.
Comp. | 5:1 | 10:1 | 19:1 | 1.2:1 | - | |
3,216 x 2,136
|
Images
(Avg Size) |
242
4.2 MB |
469
2.2 MB |
911
1.1 MB |
-
|
-
|
Approx.
Comp. | 5:1 | 9:1 | 18:1 | - | - | |
2,144 x 1,424
|
Images
(Avg Size) |
534
1.9 MB |
1024
1.0 MB |
1924
532 KB |
-
|
-
|
Approx.
Comp. | 5:1 | 9:1 | 17:1 | - | - | |
We strongly recommend buying a large capacity SD/SDHC memory card at least a 1GB card, preferably a 4GB one, to give yourself extra space for extended outings, or when shooting RAW files and/or HD video. (Check the shopping link above, cards are really cheap these days, so no reason to skimp.)
| ISO Series ( High ISO�NR = Normal) | ||||||
| ISO 100 | ISO 200 | ISO 400 | ISO 800 | ISO 1,600 | ISO 3,200 | ISO 6,400 |
| High ISO NR = Off Series | |||
ISO 800 | ISO 1,600 | ISO 3,200 | ISO 6,400 |
| High ISO NR = Low Series | |||
ISO 800 | ISO 1,600 | ISO 3,200 | ISO 6,400 |
| High ISO NR = High Series | |||
ISO 800 | ISO 1,600 | ISO 3,200 | ISO 6,400 |
| Contrast Series | ||||||
-3 | -2 | -1 | Normal | +1 | +2 | +3 |
| Saturation Series | ||||||
-3 | -2 | -1 | Normal | +1 | +2 | +3 |
| Color Series | |||
Standard | Vivid | Neutral | Monochrome |
Portrait | Landscape | sRGB | Adobe |
| D-Lighting Series | |||
Low | Normal | High | Extra High |
| Brightness Series | ||
-1 | Normal | +1 |


No comments:
Post a Comment