5 Reasons Why You Should be Doing Night Photography
A Post By: Jim hamel
We photographers tend to avoid night photography. Sure, there are some who seem to specialize in it, but most of us stick to daylight hours.
Historically, there were good reasons for this. Night photography was hard. You couldn’t see what you were doing because there were no LCD screens on camera. Every mistake cost you money in the form of film and processing. Even when digital cameras came on the scene, the low light performance in most cameras was so atrocious that it made it difficult to shoot at night.
But now, times have changed. Obviously, with digital, you can see exactly what you are doing and take as many test shots as you like. Cameras – and the low light performance of cameras in particular – have improved drastically in the last three to five years. Post-processing tools have come a long way as well, so now you can enhance your night photos a great deal.
All that makes night photography much more feasible. But is it something you should do? Will it lead to great photos? Is it fun?
The answers are; yes, yes, and yes. In this article, I will show you some of my favorite things about night photography. Once you get started, you are sure to have some of your own reasons.
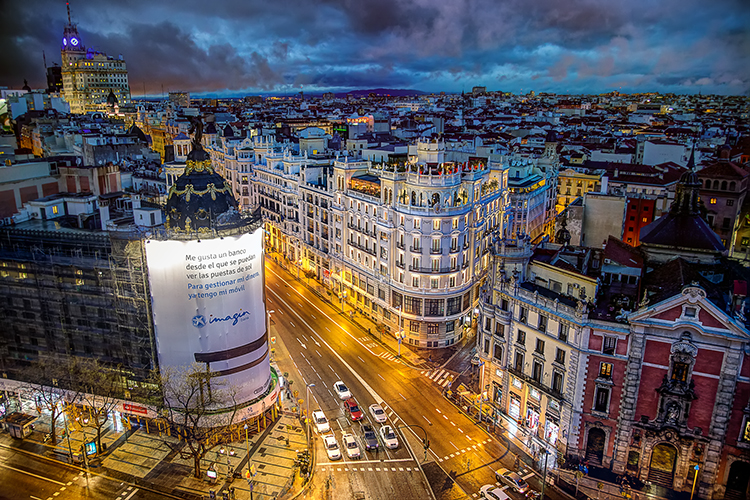
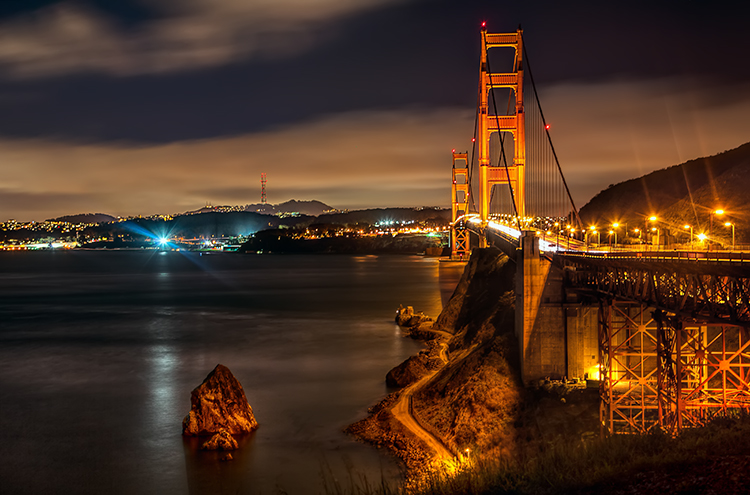
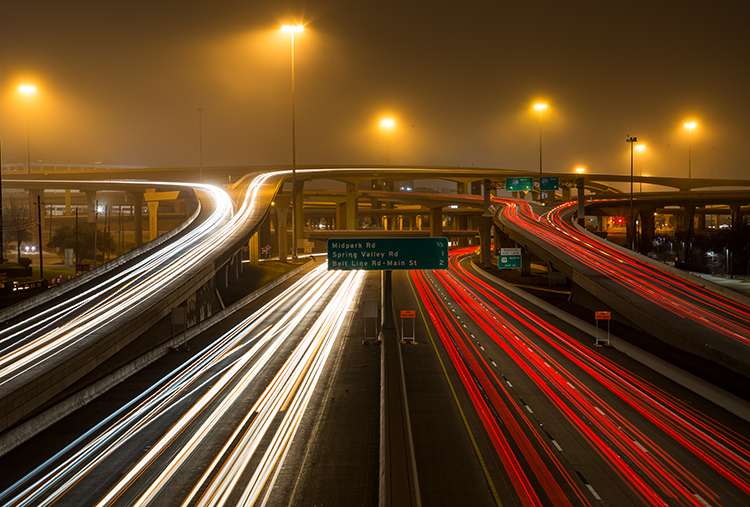
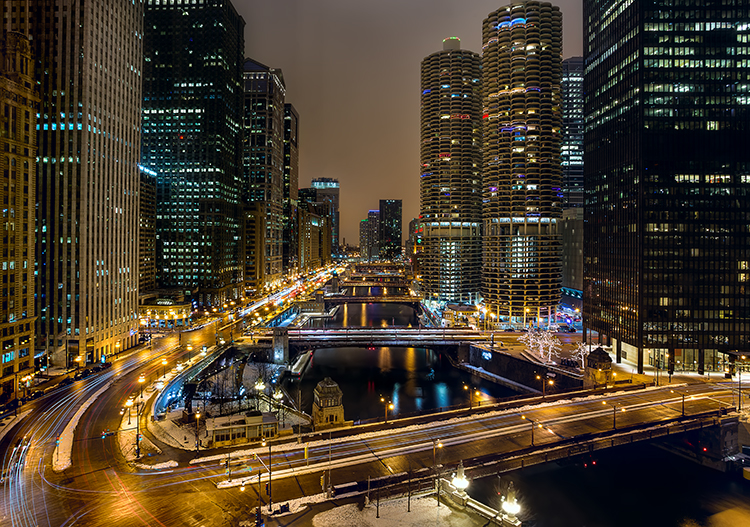
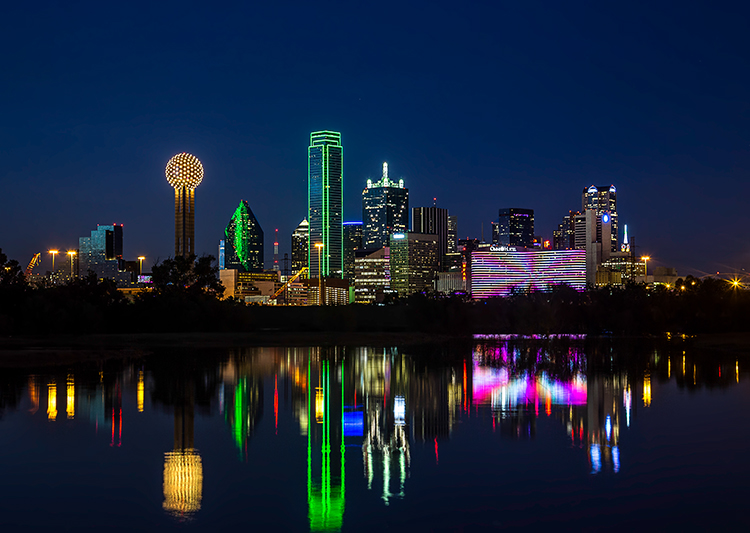
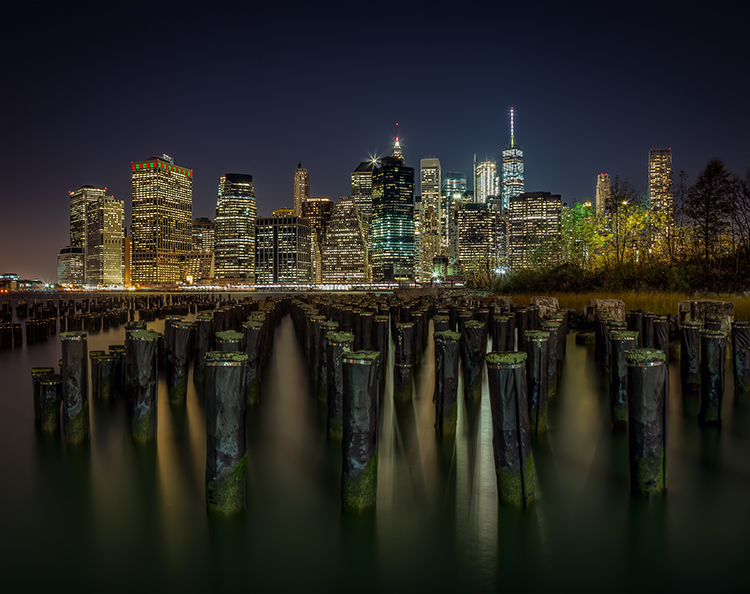
1. Otherwise mundane places are dramatic at night
Most photographers struggle with one thing in particular. That is how to make their photos stand out from the crowd.
Photographing at night can help you make that happen. Let’s be clear, though, just taking any old photo at night won’t get you there. But you’ll be surprised at how many locations that appear rather mundane or drab during the day can be made to look incredibly dramatic at night.
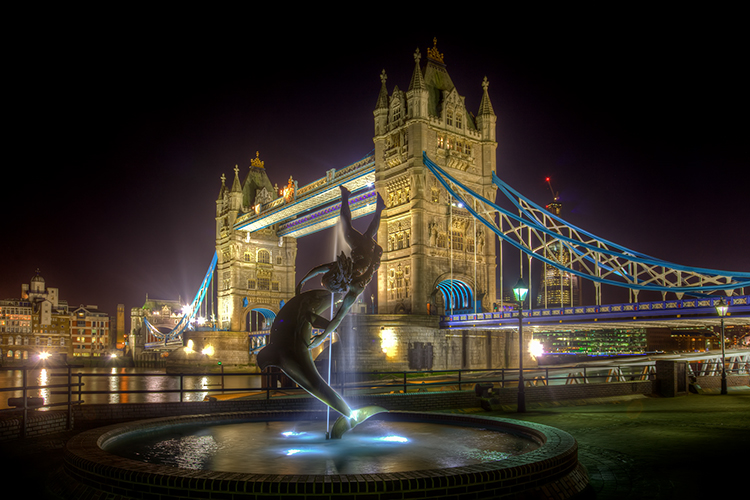
In cities, for example, you will find well-lit facades, bridges, skylines, etc. The city lights add interest and give you lots to work with. During the day, these appear flat and uninteresting. At night, however, there is usually dramatic lighting added. In rural environments, you have the night sky. A clear sky in the daytime is nothing special, but at night you are treated to a sky full of stars. In either case, you can add your own light to the scene via a flash unit or light painting (bring your flashlight!).
In addition, the night is just different than what most people normally see. That’s not to suggest that night photography is somehow a novelty, but photography during the day is much more common. People are accustomed to seeing photos during the day. They are even used to seeing dramatic sunrise and sunset photos. Night photos are a little more unusual. Take advantage of it.
2. You can achieve amazing effects that are impossible during the day
Light trails, starburst effect, motion blur . . . these are all easy at night. The long shutter speeds that are often required for proper exposure in night photography can lead to really cool effects. In addition, at night you can work with lights that just aren’t on during the day.
At night, not only are you taking pictures that many others don’t take because they are at home, but you are also taking pictures that many photographers can’t take. You need to have more than a rudimentary understanding of exposure to get a good night shot. Long exposures are very common, so a tripod and a remote shutter release are necessities. Beyond that here are some other considerations for night photography:
- You need to control shutter speed to get motion blur where you want it and avoid camera shake when you don’t.
- Aperture control is needed to balance competing goals of letting enough light in, achieving a proper depth of field, achieving a starburst effect to lights, and avoiding diffraction.
- You need to control ISO to achieve a proper exposure without an intolerable amount of noise that often goes along with night photography.
Granted, some of these things are issues during the day as well. But they are much more of an issue at night. The lack of light is not that difficult to overcome, but you do need to know what you are doing.
3. The light never changes
As someone who loves landscape photography, it can be really frustrating to spend all your time waiting for fleeting moments of light that may or may not ever arrive. Have you ever considered what percentage of a typical day is actually good light for landscape photography? It is a tiny window! Furthermore, how many times have you awaited a sunset and aftermath that didn’t even pan out?
With night photography, on the other hand, you aren’t waiting around for the light. Once the sun is fully set, the light never changes. It is just always dark. Streetlights, spotlights, and other artificial lights aren’t changing (so long as they are on), but rather are constant. So you have all night.

You can go out any night and things will be the same. Once you are out, you don’t have to hurry your exposures on account of the changing light. Of course, you may have to hurry if your subject is moving, but it won’t be on account of the changing light.
4. It is Not So Weather Dependent
Night photography is also not as dependent on the weather. For example, at night, whether it is clear or cloudy, any sky in your picture will likely be black or very dark. You aren’t looking for particular cloud formations.
That said, certain weather is not conducive to photography whether it is day or night. Grey, misty days often don’t lead to great pictures (unless you are looking for a mysterious element). And you probably don’t want to go outside in a monsoon or storm. But for the most part the background of your shots just isn’t as weather dependent as shots taken during the day.
5. It fits your life
You know how you want to get out and do more photography but life keeps getting in the way? You cannot get out during the week because you have to work. On weekends you seem to be tied up with family commitments and errands. It seems like there is never a good time to get out and do some photography.
Most people find, however, that it is easier to get out and do photography at night than during the day. During the day, you are working. At night, most people are off work. During the day, there are family activities. At night the family is winding down and/or going to sleep. During the day, there are errands to run. At night, most stores are closed. You get the idea. There is just less going on at night, such that it always seems easier to get away and do some photography.
Conclusion
Don’t forget – half of every day consists of night. In fact, in higher latitudes, the winter can feel like nothing but darkness. But by neglecting the night, you are overlooking the majority of every day. In some ways, you are missing the best part.


